Welcome to Dylan Vianen’s Documentation
Final Project (Visionary Hands)
12 Final Project
12.1 Introduction
HI! Im Dylan Sheldon Vianen,
I’m a self learned programmer
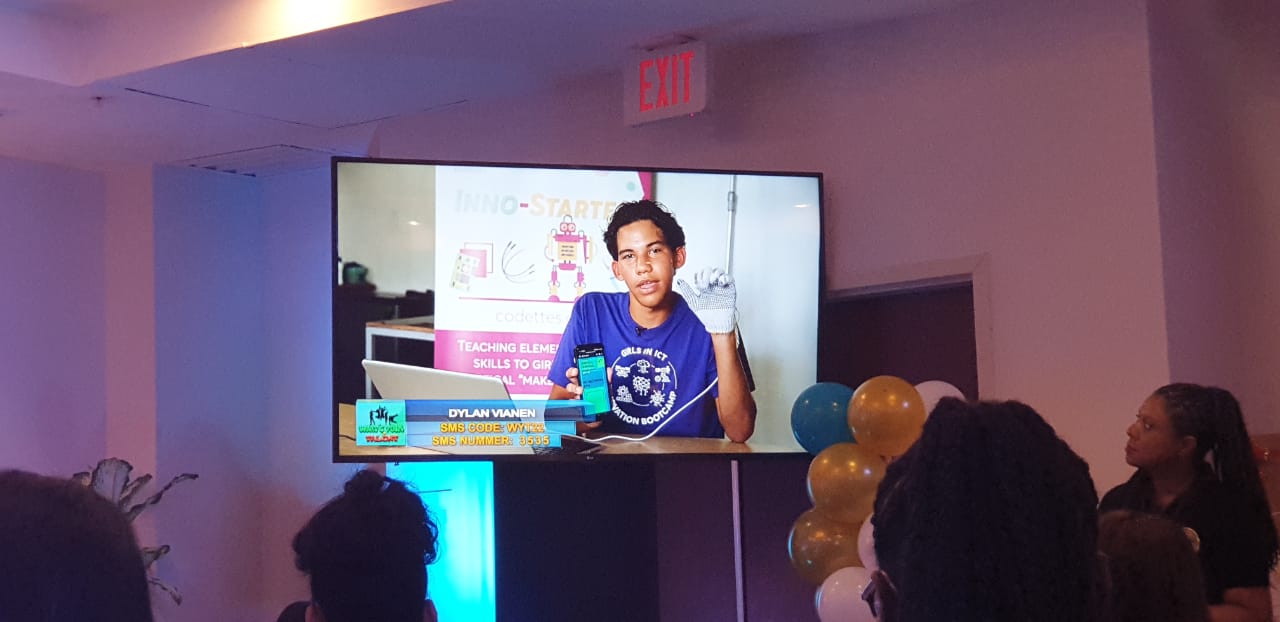
And throughout my journey in the codettes bootcamp i have learned about alot of things related to being a fablab manager, won Whats Your Tallent? 2022 and i won Hackotopia 2023.
12.2 The Idea
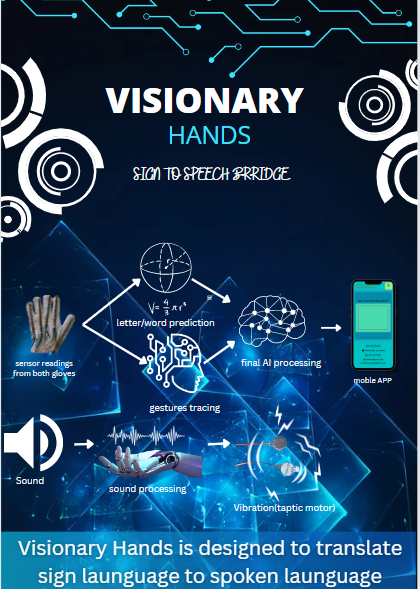
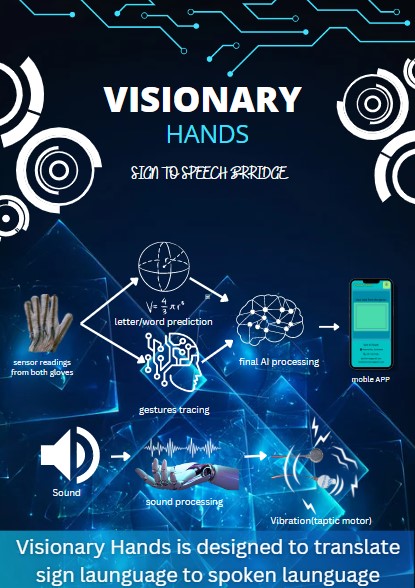
Visionary hands is a sign language to speech bridge built inside a glove. It is a project from our HackOmation IoT Challenge 2022. The aim is to translate hand signs via strain gauges to letters using a library of known signs and an AI engine for improving detections.
The next iteration involves combining two gloves with accelerometers to also capture gestures and convert those to words using inverse kinematics of the human upper body.
12.3 Research & Initial conclusions
While researching I found out that building the AI model was gonna be my hardest challenge to beat. Further I found out that an AI model can also be run on a ESP32 so that saved me from having an extra microcontroller for just je AI model or a whole other microcontroller for everything.
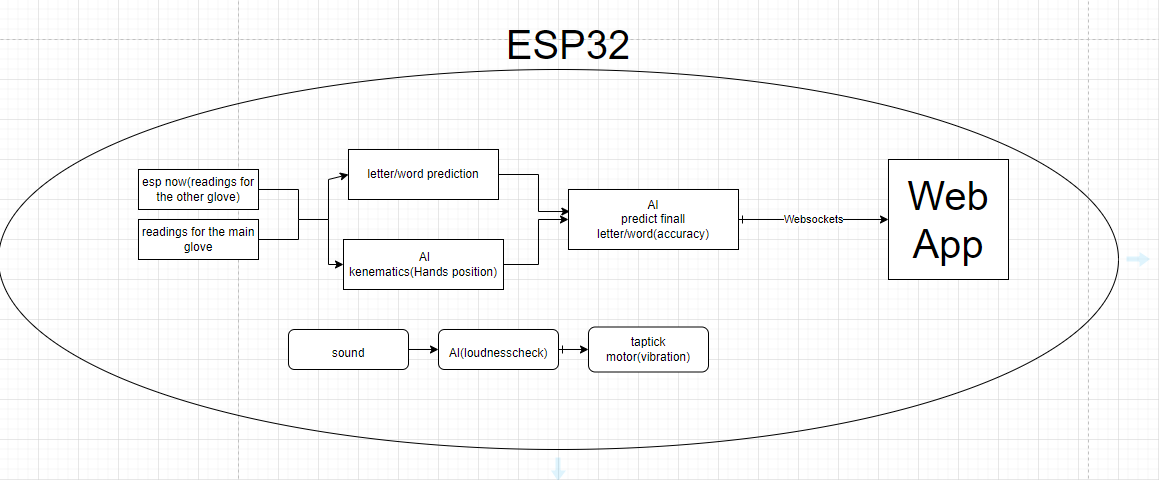
12.4 System Architecture
On the newest version I wanted to add 2 AI models ,a vibrator to alarm the person if they are being called and make the arduino code better. it does not seem like much but the AI part is the most hardest to do
The first AI model is for better reading accuracy of the words and letters and the second one is for the inverse kinematic modeling.
The vibrator is going to be controlled by sound loudness that is going to be changeable
12.5 Physical Design / Model
Version 1.0
The assembly consists of a pair of gloves, 5 flex sensors, a MPU9250, a ESP32
The flex sensors were stitched to the back of every finger and everything is brought together on a Perf-Board that is stitched on the back of the hand with a 3D base under it.
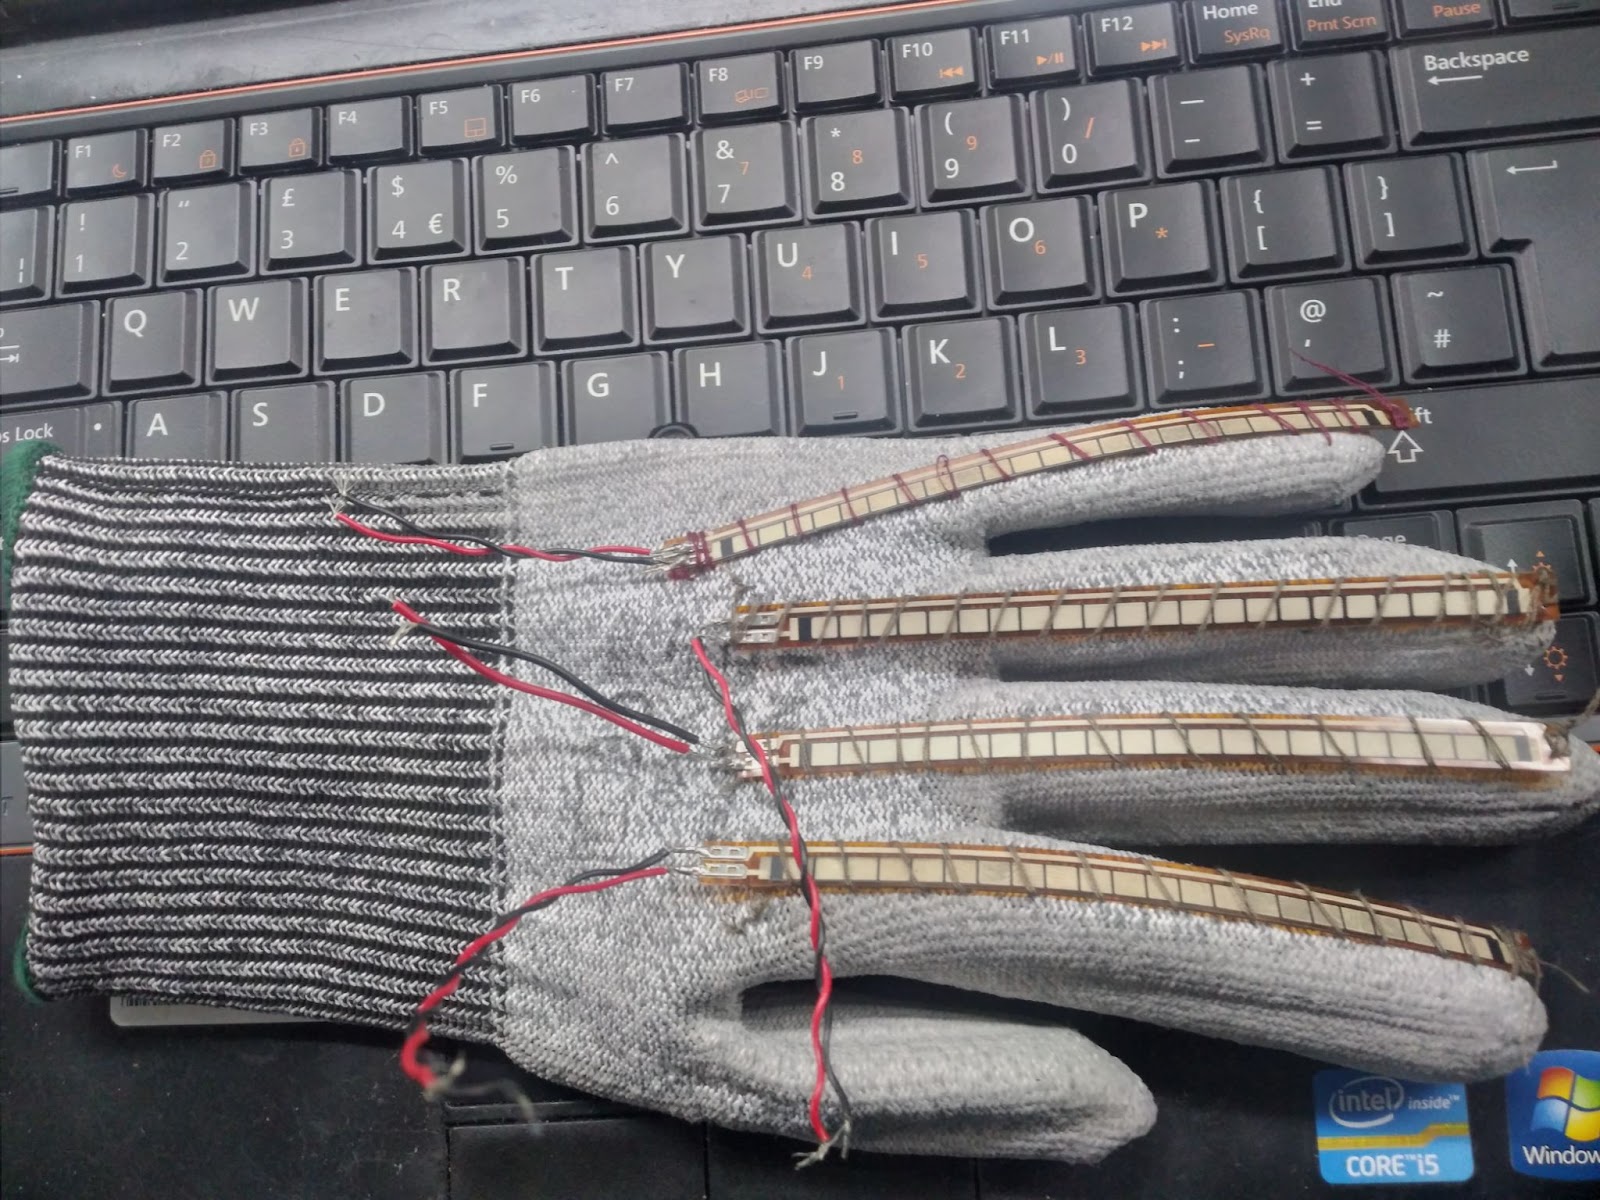
Here is a photo of the flex sensors stitched to the gloves
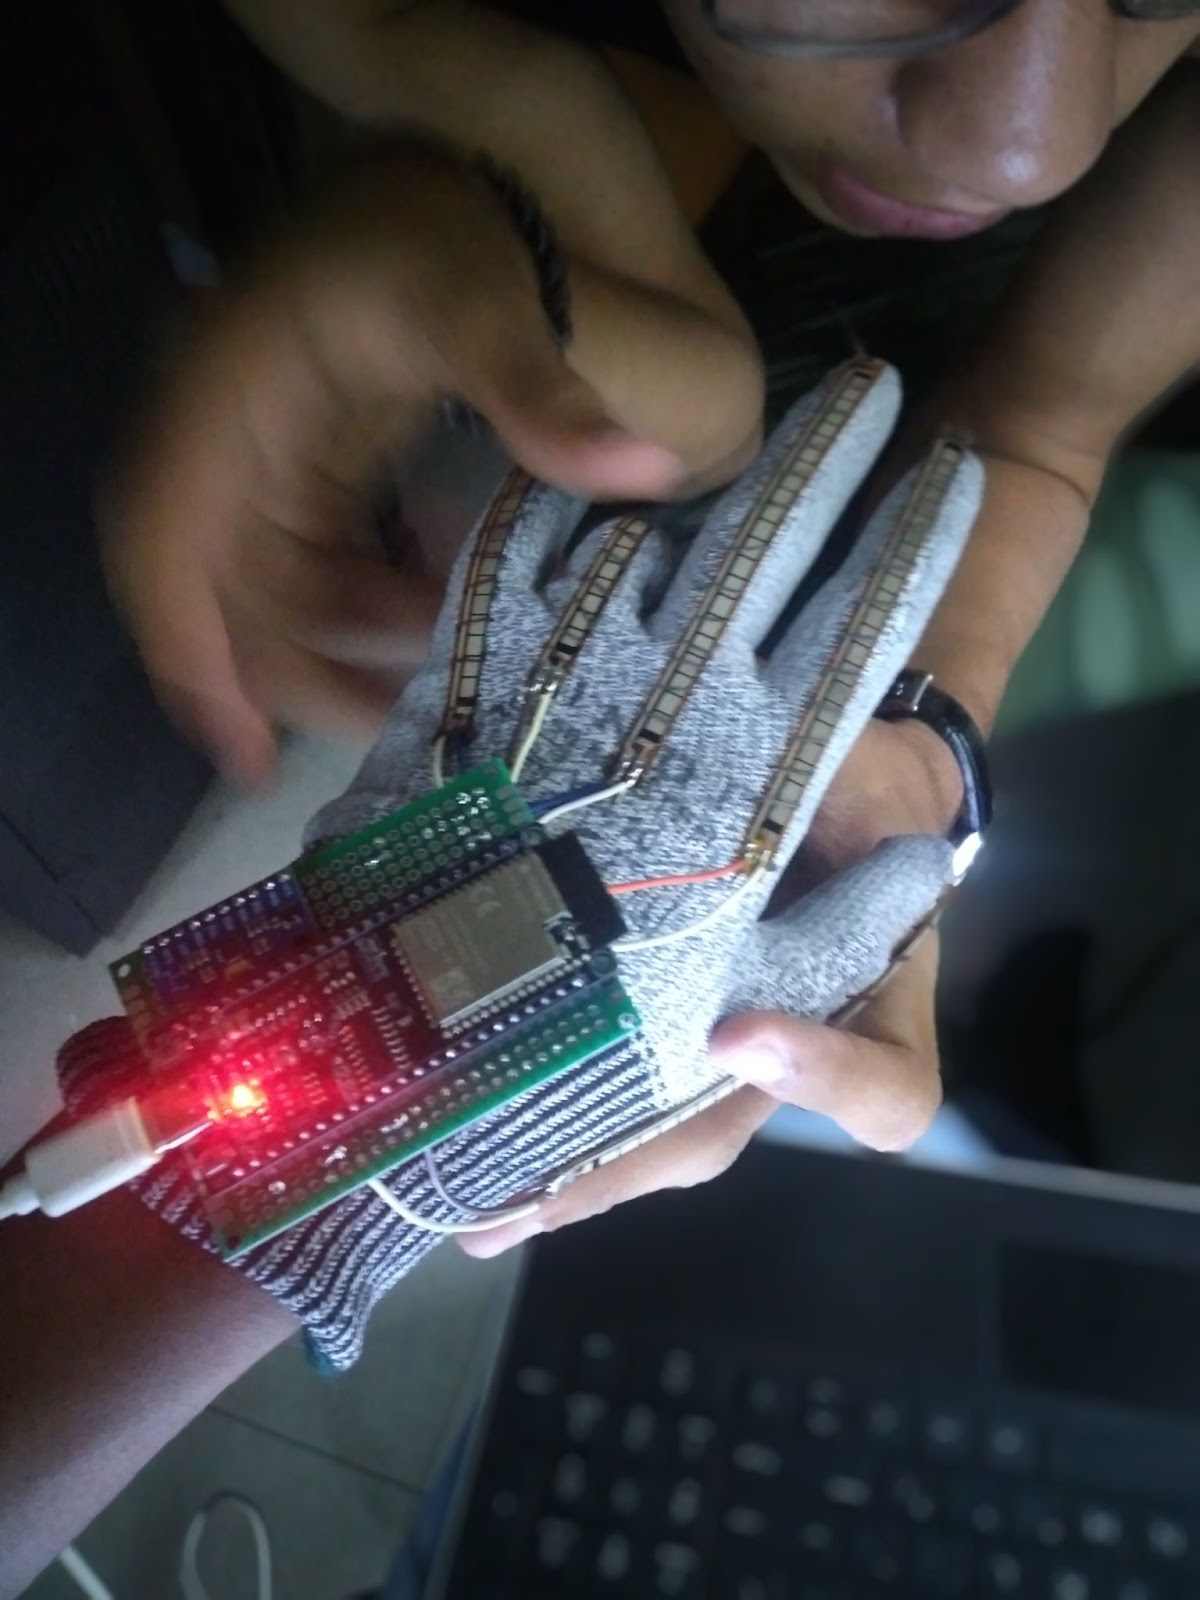
Here is the first working and fully made glove
Making the pref-board
When i was making the pref-board the first time it was the first time i actually soldered but i got the hang of it after messing up my first board lol.
I didn’t really follow a schematic so i can’t really add one but ill show a rough sketch of how i pulled the cables
INSERT DRAWING OF SCHEM
After I pulled the cables on the board, I pulled some cables to connect the flex sensors to the board. While doing that I soldered on my friend’s hand because the sensors were already stitched on the glove and or being stitched. Soldering cables on the flex sensor is not easy because you can very easily burn the connection of the sensor with heat for the iron.
Version 2.0
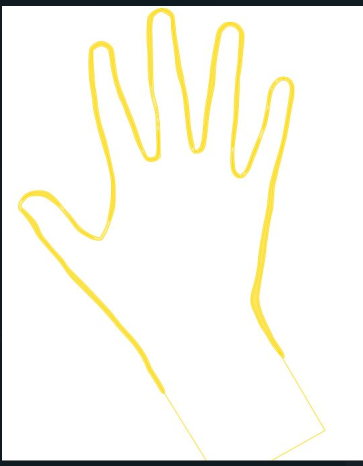
This was my first sketch of the Visionary glove it showed the build lay-up of one of the gloves
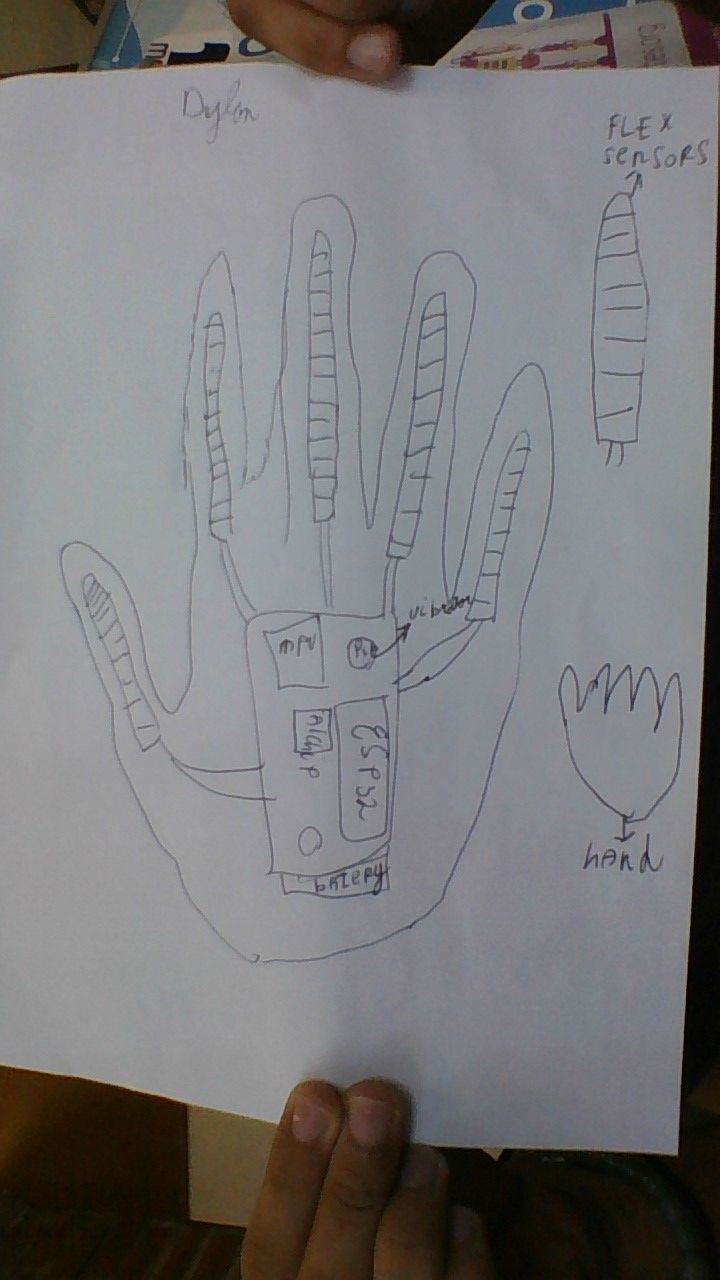
And this is the final version of my sketch

The assembly
For the second glove I bought a better fitting glove to make wearing the glove more comfy(the old ones fitted very tight on my hands) and made everything over to the new glove. While doing that I also made a new perfboard because the connections on the older ones were not that good.
To make the new perf board I also did not follow a schematic but I did make a power railing and a row for the resistors. For this build we solved the resistor problem that I had with the older versions where with the specified resistor value it gave a very low output. We found that the esp can read a higher analog value than other microcontrollers and that solved the problem.
We also 3dprinted a enclosure for the components
12.6 Embedded System & Coding
Version 1.0
The version 1 code mostly consists of if statements that check if a flex sensor is in a set range and if all the flex sensors are in a certain range a letter comes out.
Most of the letters can be read with only the flex sensors but some of the letters have some motion so that’s where the MPU comes in.
BUT i could get that to work yet so for the Hack0mation i only had letters that use the flex sensors only (15 letters or sum i lost count lol).
Ohh yeah almost forgot i made a separate library for the flex sensor to not make the main code not so bulky but it did not end as i wanted to because most of the code from the library was useless
Okay that’s enough about the small introduction about the code let’s get into it
This sets the pins of each flex sensor ` fl.intelise_output(Flex_pin1, Flex_pin2, Flex_pin3, Flex_pin4, Flex_pin5); ` This calibrates the highest and lowest flex sensor output for the constraints of the outputs
while(millis()<privtime+times)

{

if(digitalRead(7)==HIGH)

{

floatflexADC1=analogRead(Flex_pin1);

floatflexADC2=analogRead(Flex_pin2);

floatflexADC3=analogRead(Flex_pin3);

floatflexADC4=analogRead(Flex_pin4);

floatflexADC5=analogRead(Flex_pin5);

if(flexADC1<sensorMin1)

{

sensorMin1=flexADC1;

}

if(flexADC1>sensorMax1)

{

sensorMax1=flexADC1;

}

if(flexADC2<sensorMin2)

{

sensorMin2=flexADC2;

}

if(flexADC2>sensorMax2)

{

sensorMax2=flexADC2;

}

if(flexADC3<sensorMin3)

{

sensorMin3=flexADC3;

}

if(flexADC3>sensorMax3)

{

sensorMax4=flexADC4;

}

if(flexADC4<sensorMin4)

{

sensorMin4=flexADC4;

}

if(flexADC4>sensorMax4)

{

sensorMax4=flexADC4;

}

if(flexADC5<sensorMin5)

{

sensorMin5=flexADC5;

}

if(flexADC5>sensorMax5)

{

sensorMax5=flexADC5;

}

}
}
This contains the flex sensors outputs to a smaller number from 0 to 90
floatFlexgrade1=readconstrainmapflex(Flex_pin1,flexADC1,sensorMin1,sensorMax1);

floatFlexgrade2=readconstrainmapflex(Flex_pin2,flexADC2,sensorMin2,sensorMax2);

floatFlexgrade3=readconstrainmapflex(Flex_pin3,flexADC3,sensorMin3,sensorMax3);

floatFlexgrade4=readconstrainmapflex(Flex_pin4,flexADC4,sensorMin4,sensorMax4);

floatFlexgrade5=readconstrainmapflex(Flex_pin5,flexADC5,sensorMin5,sensorMax5);
Here is a example of one of the if statements
if(((Flexgrade1>=25)&&(Flexgrade1<=42))&&((Flexgrade2>=40)&&(Flexgrade2<=60))&&((Flexgrade3>=40)&&(Flexgrade3<=60))&&((Flexgrade4>=35)&&(Flexgrade4<=60))&&(Flexgrade5==90))

{

Serial.print("A");
}
Here is the first way i tried to minimise the spam of reading the letters but that would not work good if you need the same letter after each other
voidprintletter(charread_letter)

{

if(read_letter!=priv_letter)

{

Serial.println(read_letter);

priv_letter=read_letter;
}

}
Okay that about sums that up! On to the newest version!
Version 2.0
The code was completely rebuilt to have separate classes for everything. For example the detecting of letters and words are in a separate class, the kinematics are in a separate class and the AI accuracy is in a separate class.
The detection of words was also completely rebuilt with the help of math and vector distance. This new code does not yet have the kinematic modeling added to it but I do have an older version where that is added.
Before I actually created the circuit I made a tinkercad circuit to simulate it:
AI model 1: Accuracy
Training set
For this model a training set is very very important so i started with that
I made an INO sketch on top of what I already had and rebuilt it to have websockets. After I enter a letter in the serial plotter the ESP sends 50 examples back to back with the entered letter.
The examples are then sent to a python script with websockets and are then stored in a CSV file.
AI model
Not yet made
AI model 1: movement
Training set
For the training set I made an arduino sketch which collected 218 rows of raw data in one sample then prints a space that means for the AI model that it is the end of the sample. For each movement I collect 100 samples and save them in a CSV that has the name of the movement, for example shake.csv.
AI model
The Ai model is made in google colab with tensorflow and python.
The Ai model has a list with the names of the movements and opens them one by one and saving all the samples to the tensorflow model after that the model is ran and the trained model is converted in a .h file that then can be used in arduino
The problems
- Vector problem
Because the code works with the distance of lines it sometimes mistakes some letters as others because mathematically they are the closest. To solve this I’m trying to work only with the raw values to calculate the distance of the letters and what’s read.
Electronics Design & Production
Version 1.0
For this version all i had for the electronic design was a 3d printed base that lifted the components of the glove
Version 2.0
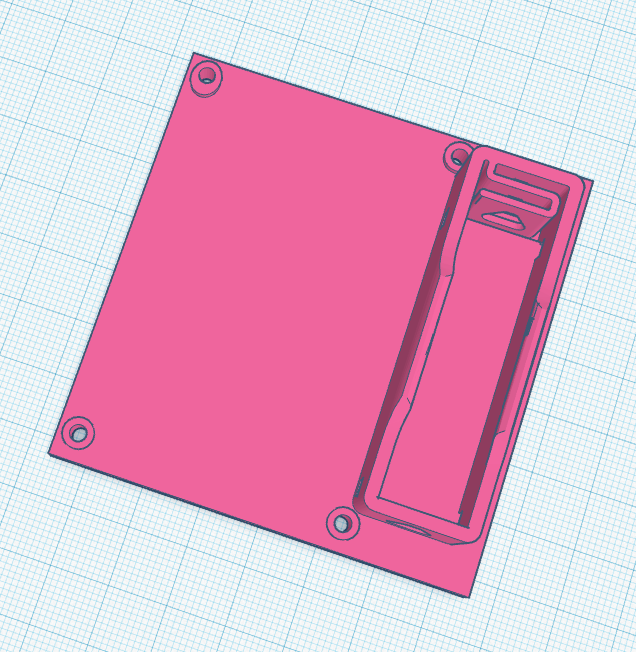
For this version i began with a box-like case
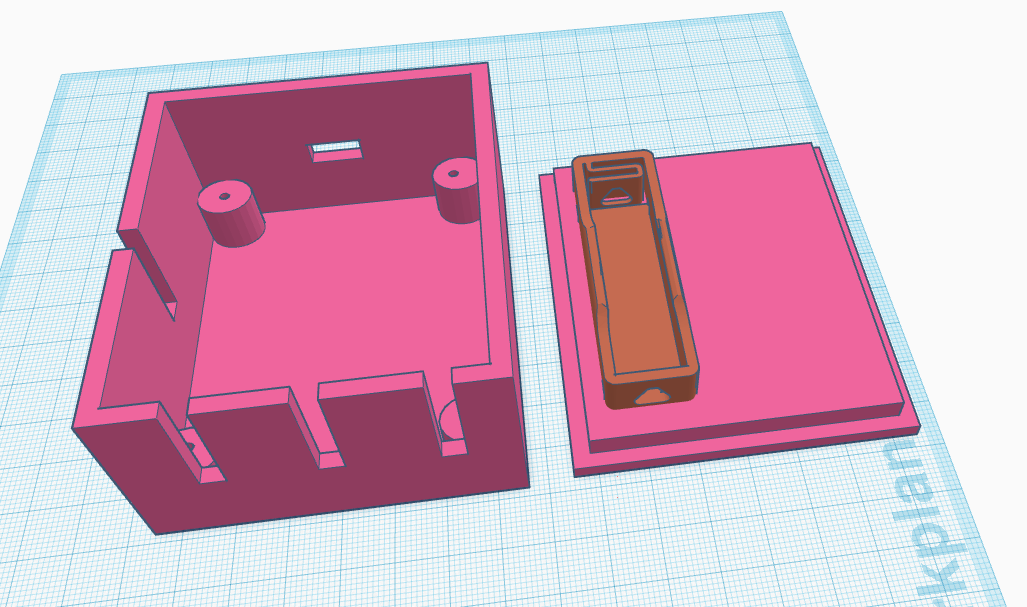
Then i tried a new bottom

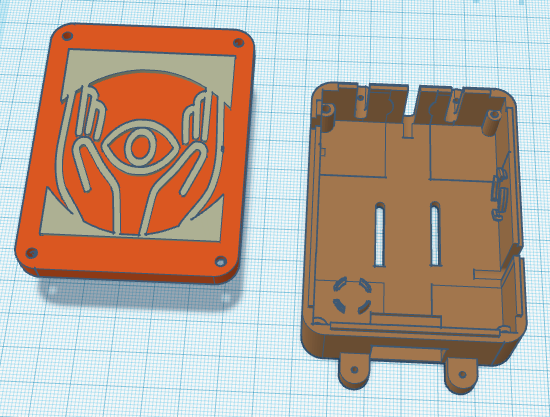
Then i lastly iterated with a whole new design with the logo on the top and clips to hold the vibration motor and mic in place
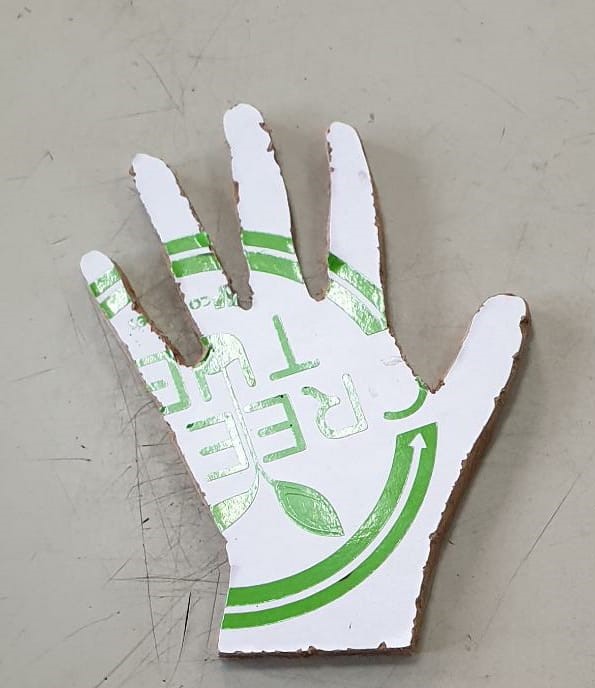
For cnc i cnced a hand do hold the glove when displaying or transporting
For lasering i only made a sketch because the laser is down
Front End design & Coding
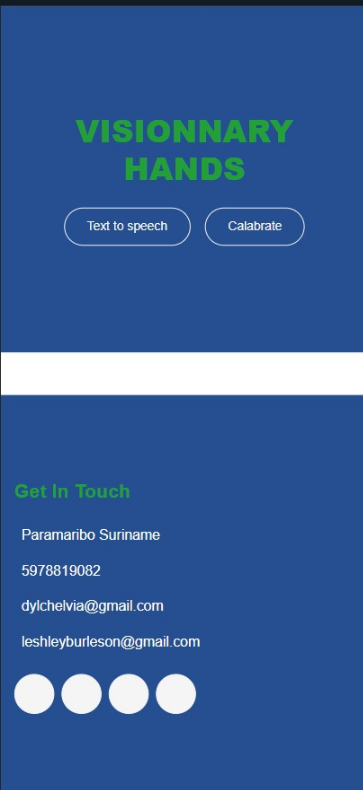
For the first version i was helped a lot with making this 1 but this 1 did not focus on the letter or word so i made a new version

For this version i kept it sleek and simple, focussing on the letter/word
The js code is the same for both to here is a quick sum of that
vartextonread;

constws=newWebSocket("ws://192.168.1.17:81");  //"ws://192.168.4.1:81");
//connect to another espon websocket too. (the one where il be sending he messages)
vart=0;
Here we connect to the ws connection made on the esp32
ws.onopen=function () {

alert("Connection opened");

//speak();

};

ws.onclose=function () {

alert("Connection closed");

};
Here are sum simple on open and onclose add handlers
ws.onmessage=function (event) {

vartext=event.data

consta=document.createElement('a');

a.textContent=text;

if (text==" ") {

varbox=document.getElementById("super");

sleep(3000);

box.replaceChildren();

}

else{

textonread==text;

varbox=document.getElementById("super");

box.append(text);

console.log("test");

console.log(text)

}

};
Where when a message comes in from the glove via websockets the message gets processed and if its a empty space the text to speech gets called and after 3 sec the text box gets cleared
functionsettings() {

if (t==1) {

document.getElementById('settings').style.display='flex';

t=0;

}

elseif (t==0) {

document.getElementById('settings').style.display='none';

t=1

}

}
Here there is a toggle for the settings button
functionsleep(milliseconds) {

constdate=Date.now();

letcurrentDate=null;

do {

currentDate=Date.now();

} while (currentDate-date<milliseconds);

}
This is a sleep function because js does not have 1 built in lol
functionspeak(text) {

varmsg=newSpeechSynthesisUtterance();

varvoices=speechSynthesis.getVoices();

msg.voice=voices[1];

msg.voiceURI='native';

msg.volume=1;

msg.rate=1;

msg.pitch=2;

msg.text=text;

msg.lang='en-US';

speechSynthesis.speak(msg);

console.log(text);
}
This is the text to speech function that takes a String as input and reads it out
The full stack
On the newest version I wanted to add 2 AI models ,a vibrator to alarm the person if they are being called and make the arduino code better. it does not seem like much but the AI part is the most hardest to do
The first AI model is for better reading accuracy of the words and letters and the second one is for the inverse kinematic modeling.
The vibrator is going to be controlled by sound loudness that is going to be changeable
Back-end
For the back-end i hosted the webpage and liked a database to store the incoming sensor data for maintaining the AI database
Here is the code explained
const { json } =require("express");

constexpress=require("express")

constpath=require("path")

constapp=express()

varMongoClient=require('mongodb').MongoClient;

varurl="mongodb://127.0.0.1:27017/";
Here we are calling the needed libs
client.on('connectFailed',function(error) {

console.log('Connect Error: '+error.toString());
});

client.on('connect',function(connection) {

console.log('Connection established!');

//client.send()

connection.on('error',function(error) {

console.log("Connection error: "+error.toString());

});

connection.on('close',function() {

console.log('Connection closed!');

});

connection.on('message',function(message) {

vardata=  JSON.parse(message)

console.log(data["letter"]);

});
});

client.connect('ws://192.168.1.10:81');

console.log("HERE!")
Here we have all the handlers and here we are connecting to the glove
// Express static webserserver

constpublicDirectoryPath=path.join(__dirname,'data')

app.use('/',express.static(publicDirectoryPath))

Here we are hosting the website

// Express API routes

app.get('/log', (req,res) => {

res.send(recall())

})

app.get('/lastseen', (req,res) => {

res.send(finduserList())

})
Here we are declaring the APIs for the recall of data
app.listen(3000, () => {

console.log("Server has started!")

})
Here we are listing for anytime from the website
Product test & demo
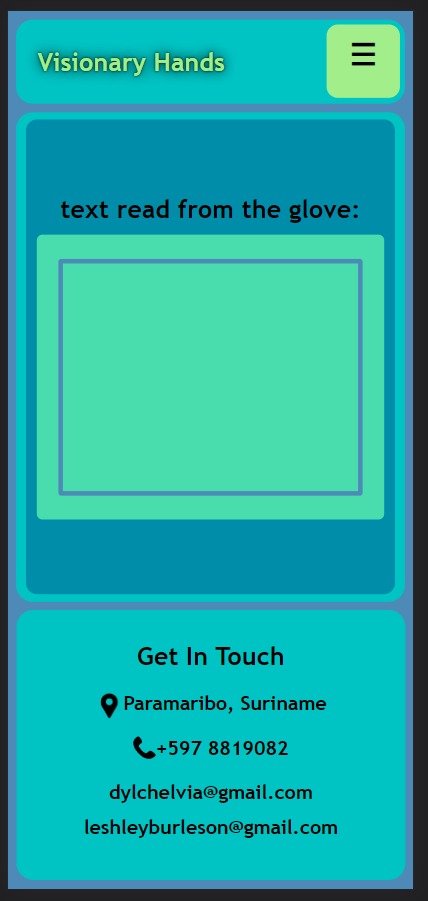

here is the gloveand the web app sepparate and
here is the video of them all working together
Business, Marketing & Promotion
Pitch deck/Poster
the pitch deck is used for presenting or giving people a quick look into what your trying to do or doing
your pitch deck can have anything you want on it but it usually has everything about your project or business and it should attract people to your booth
here is my pitch deck
pitching
When you’re pitching your business you have to have an impact story about the pain you’re trying to solve at the beginning because that will draw people’s attention and make them remember your business longer. use a lot of visualizations in your powerpoint
there is my powerpoint
Business Model Canvas
So with all the things i have learned about business model canvas created 1 for my own project
And here it is
Promotional Video
For the promotion video I tried to keep it as short as possible while still getting my point out.
Here is my promo vid
Files & Downloads
Here is the link to the CSV files
Here is the link to the code for the movement
here is the link to the code for getting the training set (the mpu9250 library is needed check the version1 library zip for it)
here is the link to the new stack
here is the link to the sketch that has the kinematic modeling added(note: this version still works with if statements instead of the vector distance and is very messy)(i will if needed clarify the code a bit better)
Here is the link to all the code and 3d prints, etc of version1.0.
Here is the link to the LIBS for version1.0.
References
The journey
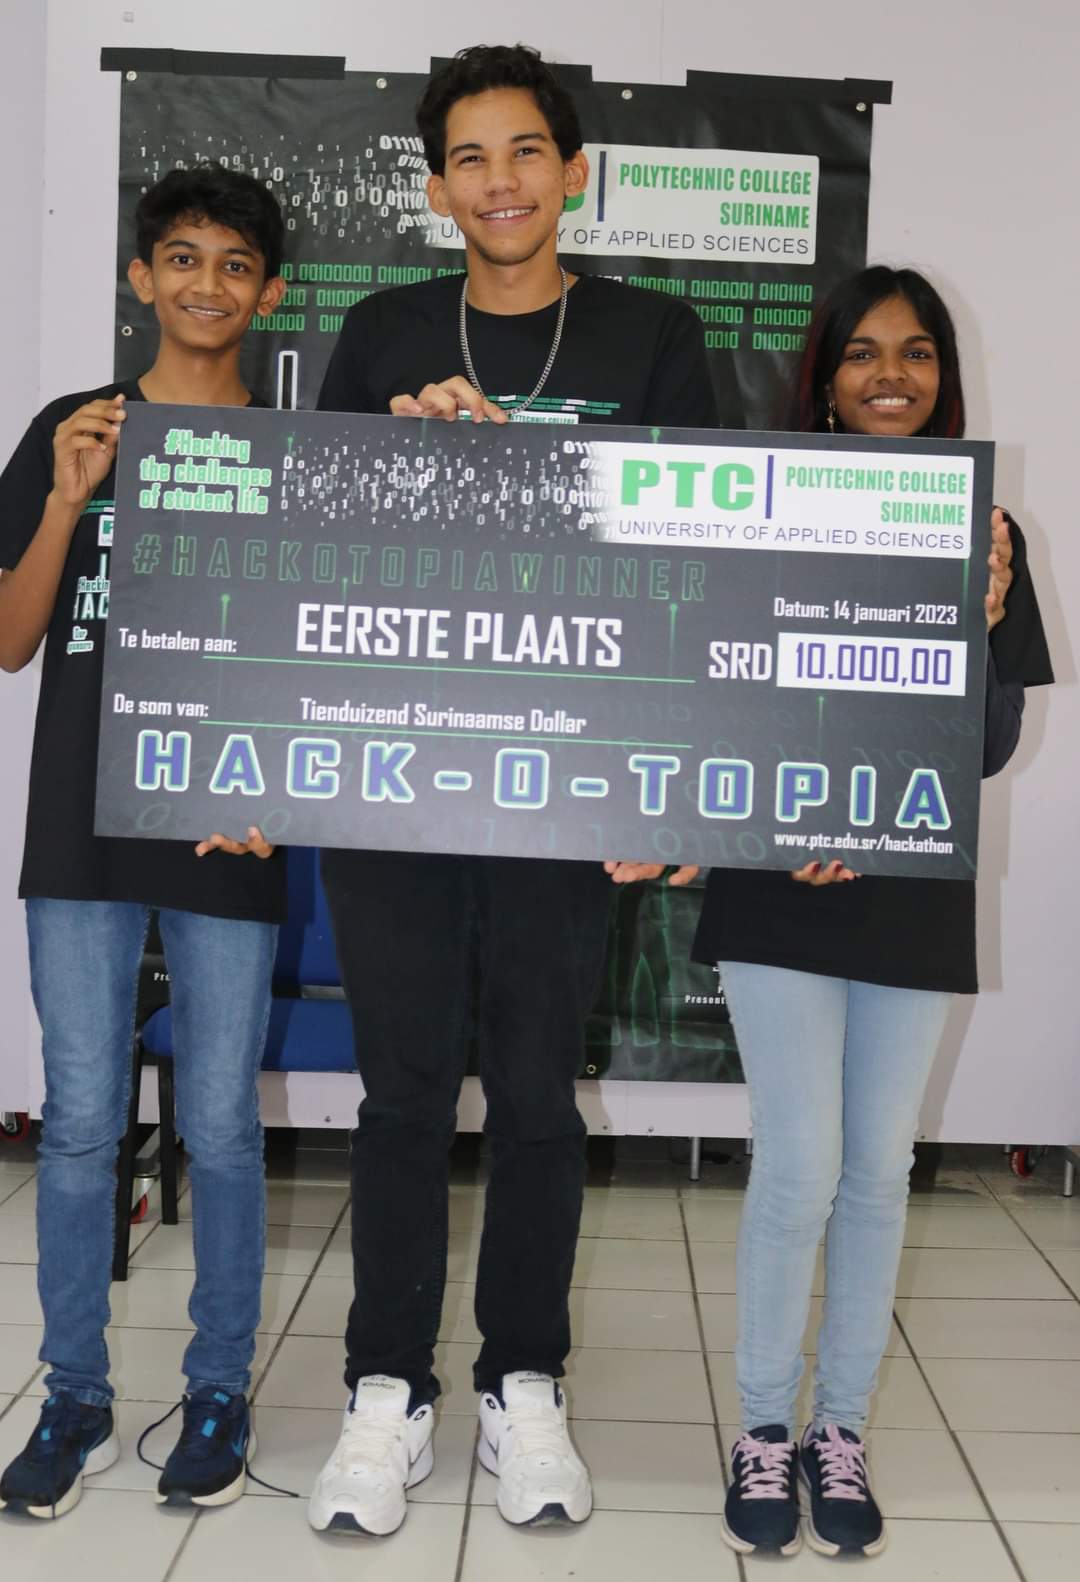
While in the Bootcamp i achevied some extra milestones on the way whiche are compiting in Hackomation 2022, Winning 1st in Whats Your Tallent 2022 and Winning 1st in Hackotopia 2023.
Hackomation 2022
hackomation is where my journey all begann.
my project Visionary hands started there with only 1 teammate at the beginning through the competition we had 2 extra members in our team but they flaked off after some time. in this competition we sadly did not
Whats Your Tallent 2022
i went into the chalange with the same final project for the bootcamp and won 1st place out of the section ICT

Hackotopia 2023
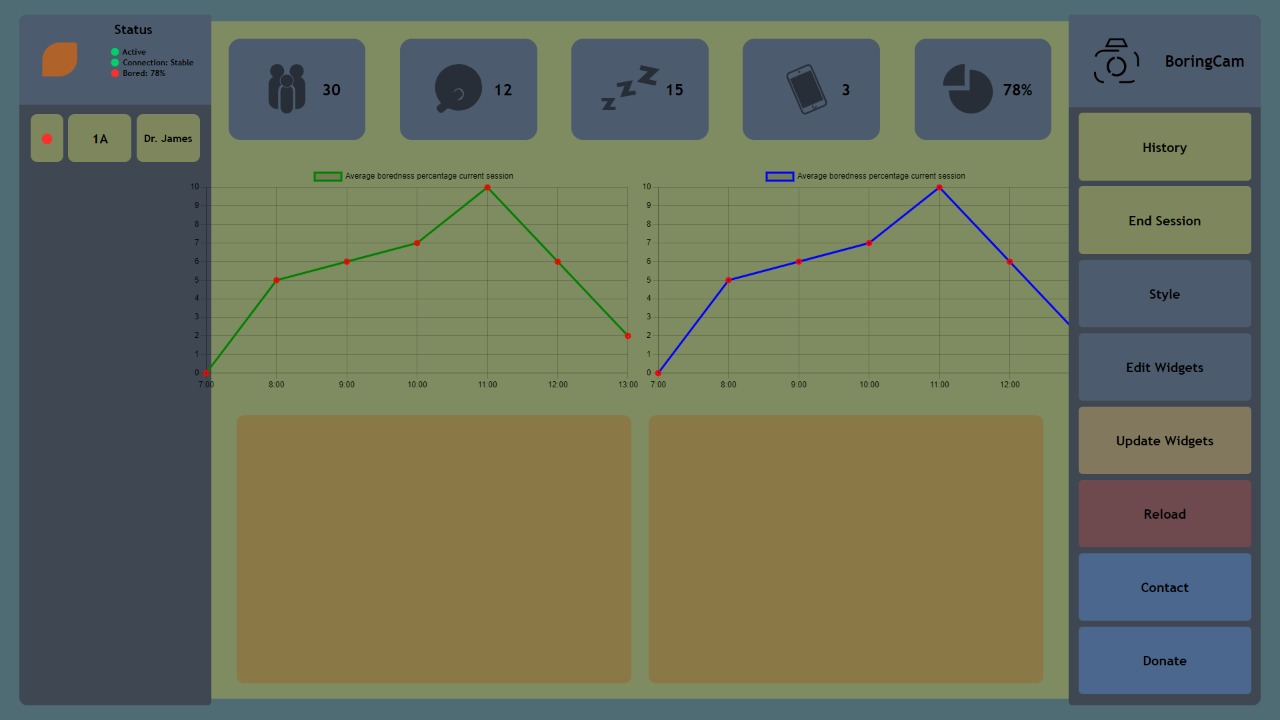
in hackotopia i was in a team with keshav and disha and our project was named Boringcam
boringcam is a monitoring tool that monitor a class to see how much student are sleeping, yawning or on there phone.
Setup Dev Environment for ESP32 S2
First i downloaded the Arduino IDE from the website
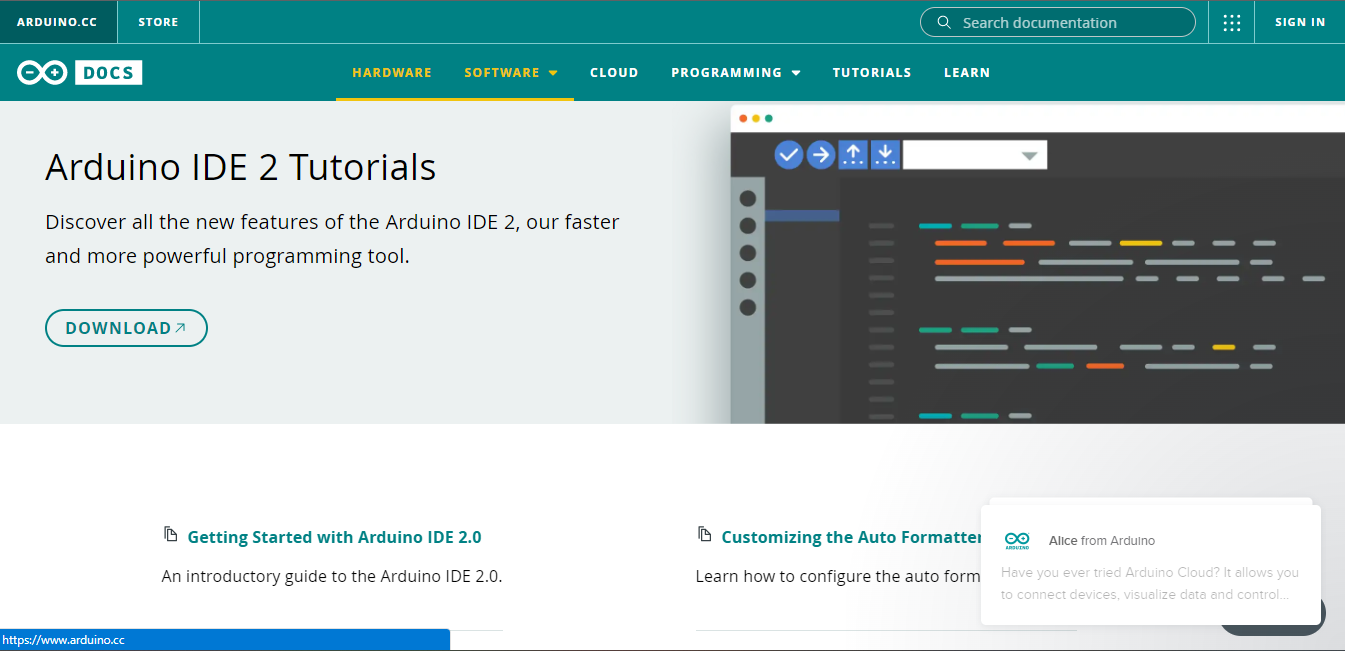
And waited until the download was done and opened the file and went through the steps for the installation.

After that i open the IDE and opened the preferences
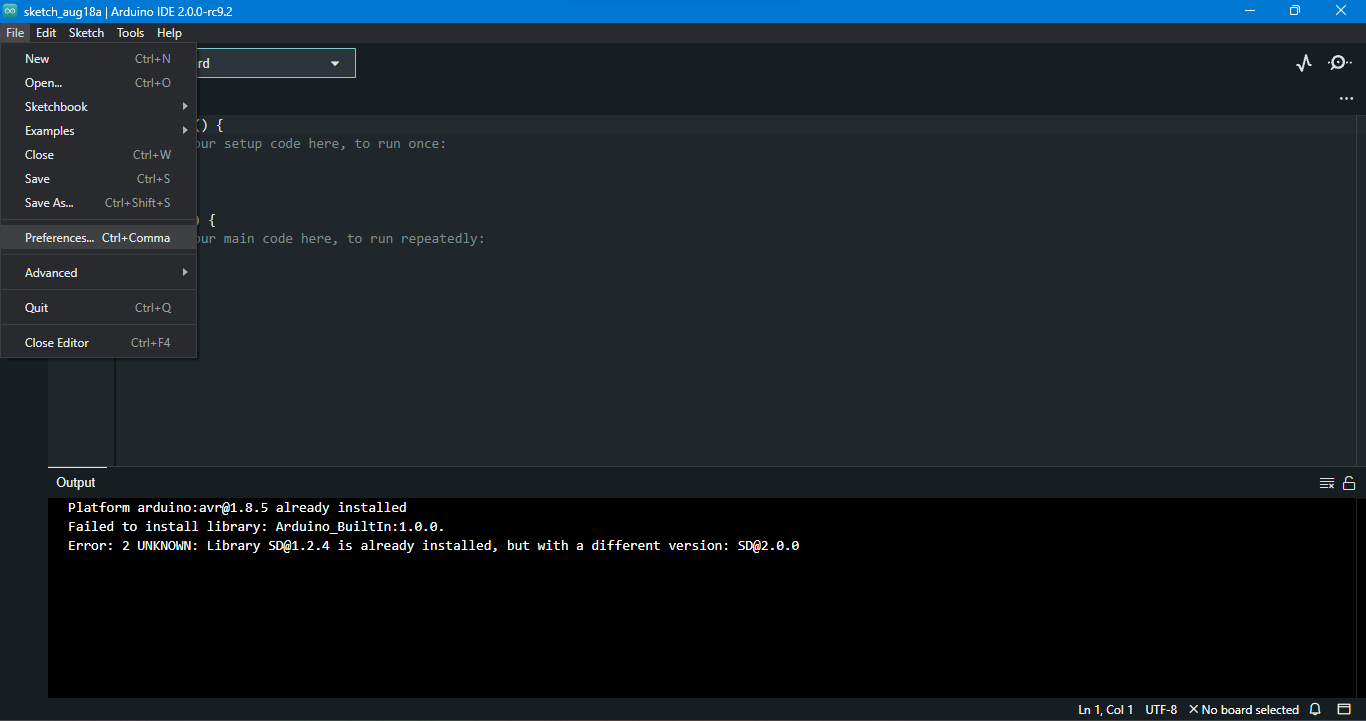
And added the link for esp32 devices on arduino IDE

After that i downloaded spiffs for the ESP32-s2
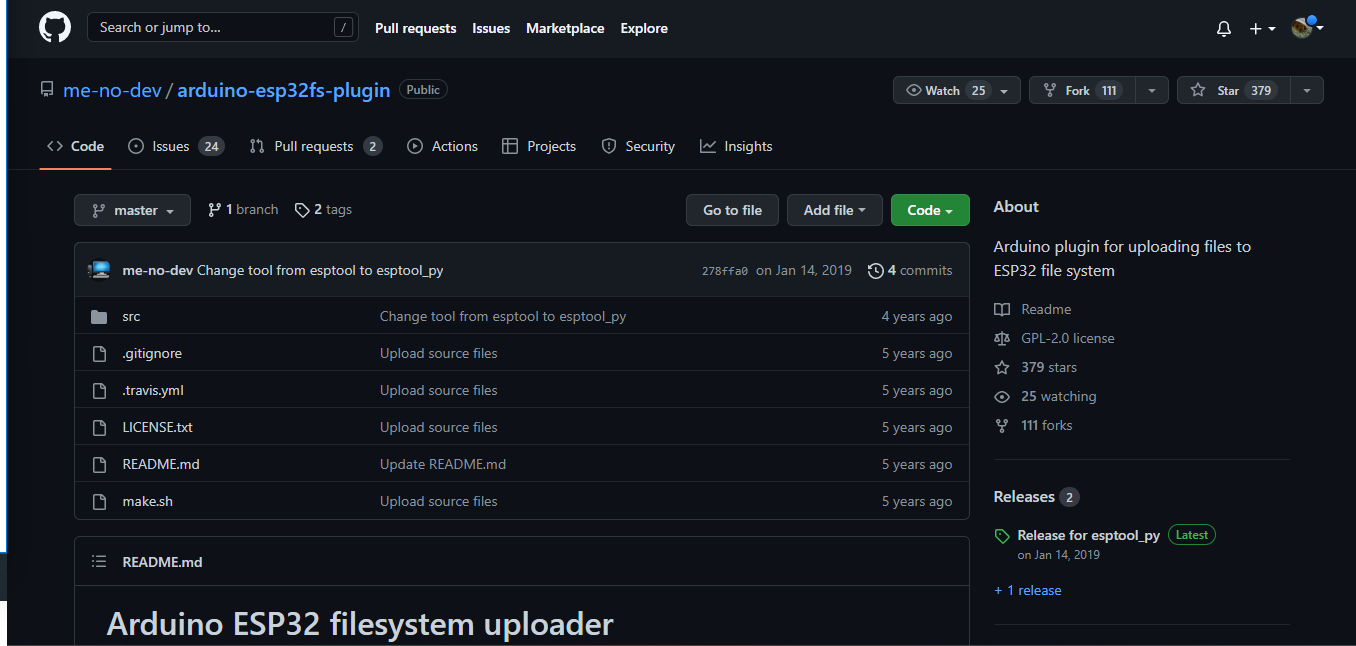
And i unzipped it in the sketchbook location
And thats it!
Build HTML5 Chat app
So the idea is to make a chat app that communicates with other users via MQTT
Introduction to HTML5
HTML (HyperText Markup Language) is the code that is used to structure a web page and its content.
Introduction to CSS
CSS stands for Cascading Style Sheets. CSS describes how HTML elements are to be displayed on screen, paper, or in other media. CSS saves a lot of work. It can control the layout of multiple web pages all at once. External stylesheets are stored in CSS files.
Building the front-end
For the front-end we started with just a sketch on a piece of paper for how we want our chat app to look like.
(Insert my sketch photo)
Here’s mine
After that we started roughly coding where everything should be in the html file
Explanation of the code
Everything from the chat app is stored in a div with a id of chatapp and a class of nothing (with a display of none). The class will later be changed by the login button
<div class="nothing" id="chatapp">
Building the back-end of the chat app
Introduction to MQTT
MQTT is a publish/subscribe protocol that allows edge-of-network devices to publish to a broker. Clients connect to this broker, which then mediates communication between the two devices. Each device can subscribe, or register, to particular topics.
Introduction to javascript
JavaScript is a scripting language that enables you to create dynamically updating content, control multimedia, animate images, and pretty much everything else. (Okay, not everything, but it is amazing what you can achieve with a few lines of JavaScript code.)
The ping and pong concept
A ping is a signal that is send by every user and when other users receive the ping they send a pong with their username and clientId
Explaining the code
This lets the chat app only connect when a button is pressed and not on startup
app = {
connection: function () {
sendMsg and sendmessage does the same thing
When they are called they get the username from the html page and publish the message that was typed by the user and then empty the input
If a message comes in it will be filtered for pings and pongs and if there is non of both it is displayed in the chatlog on the html page
function sendMsg(ele) {
  if (event.key === 'Enter' && toggle == 0) {
    var USER = document.getElementById('login').value;
    var userName = USER;//document.getElementById("loginName").value; // || "anonymous user"
    if (ele.value == "whoami") {
      console.log(userName);
      client.publish(mqttTopic, "Your name is " + userName + ", silly");
    }
    else if (ele.value == "disconnect") {
      var t = document.getElementById("toggle");
      console.log("disconnected user " + USER + " from topic " + mqttTopic)
      t.value = "disconnected";
      toggle = 1;
      console.log("off")
      console.log("disconnected")
      client.subscribe("", { qos: 0 })
    }
    client.publish(mqttTopic, userName + " says: " + ele.value);
    //alert(ele.value);
    ele.value = ""; // reset the input after entering
    // sendPing();
  }
}
This handels all the pongs that the users send and extracts the username and the clientId
app = {
    client.on('message', function (topic, message, packet) {
      if (toggle == 0) {
        msg = message.toString(); // library delivers  buffer so convert to strig first
        console.log("onMessageArrived: " + msg);
        // if it has JSON payload do NOT add to chat
        try {
          msgObj = JSON.parse(message.toString()); // t is JSON so handle it how u want
          // if message has Pin of Pong in it send it to the PingPongHandler
          if (Object.keys(msgObj)[0] == "ping") { sendPong(); };
          if (Object.keys(msgObj)[0] == "pong") { handlePong(msgObj.pong); }; // pong value is an object!!
          // other handlers for control messages below
        } catch {
          document.getElementById("chatlog").innerHTML += "<br>" + msg;
          sendPing();
        }
      }
    })
Here the userlist is updated if there if a new user that is not yet in the list
The final moment
Did I or did I not waste my time?
That is the golden question.
anddd the answer is…………………………….
YESSS it does
here is the login page of the webapp
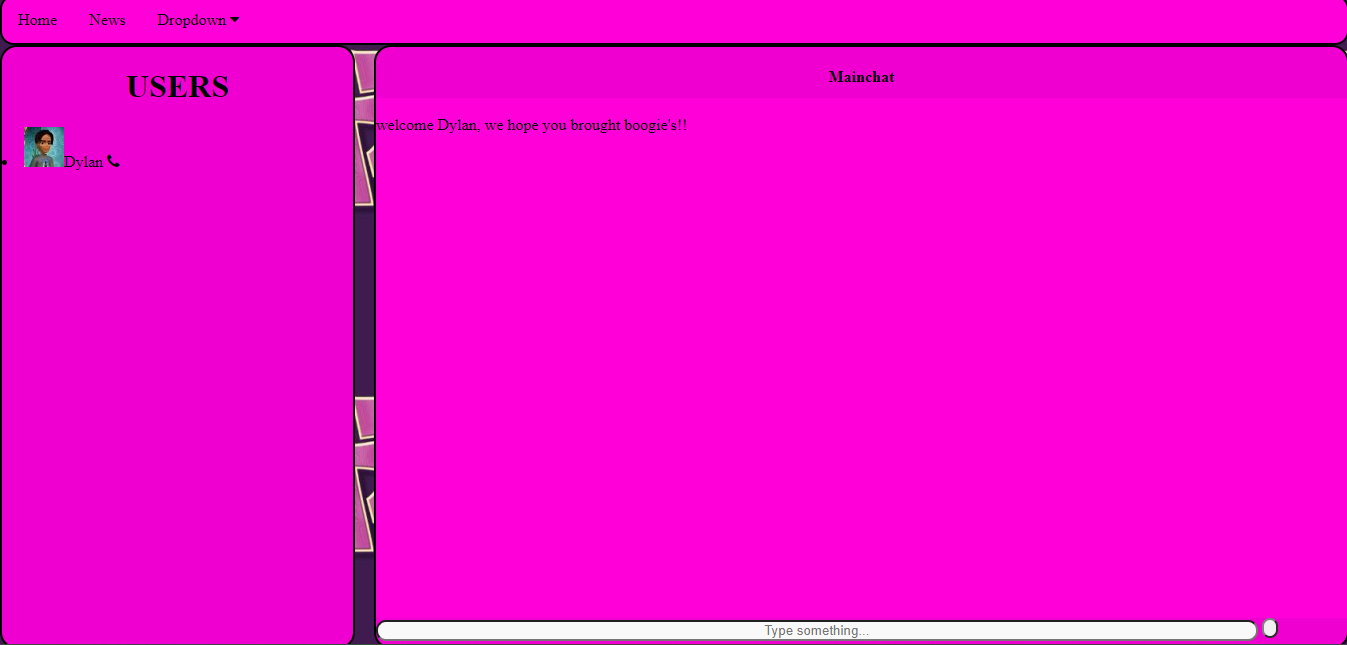
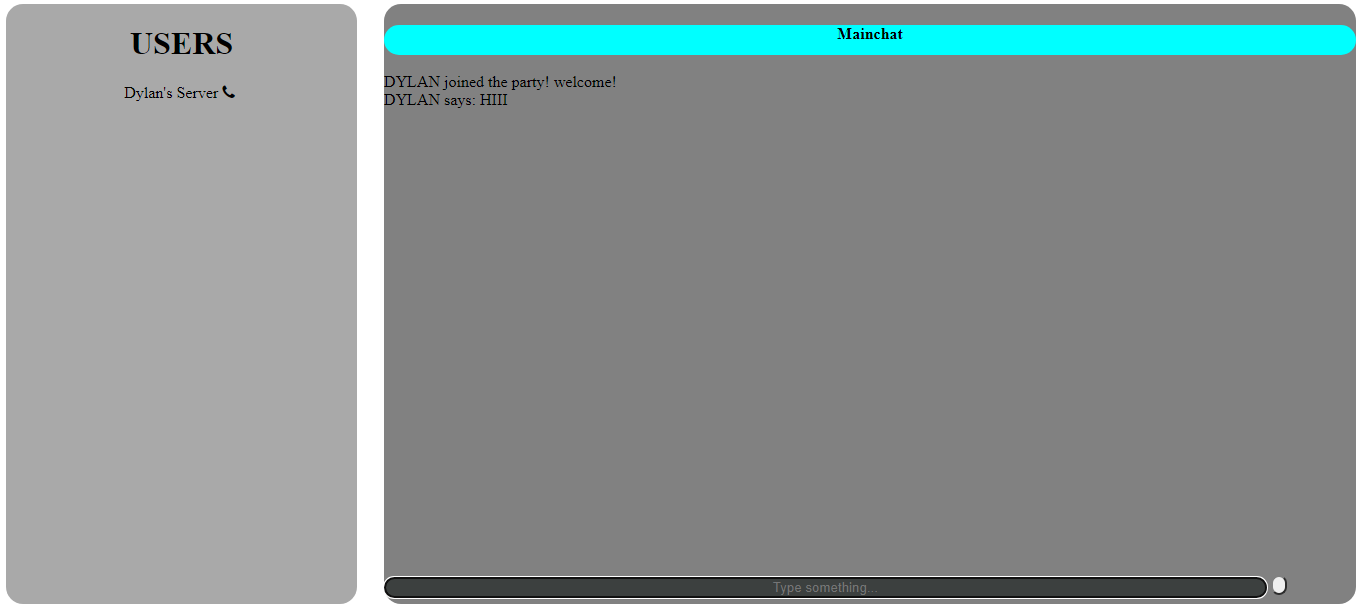
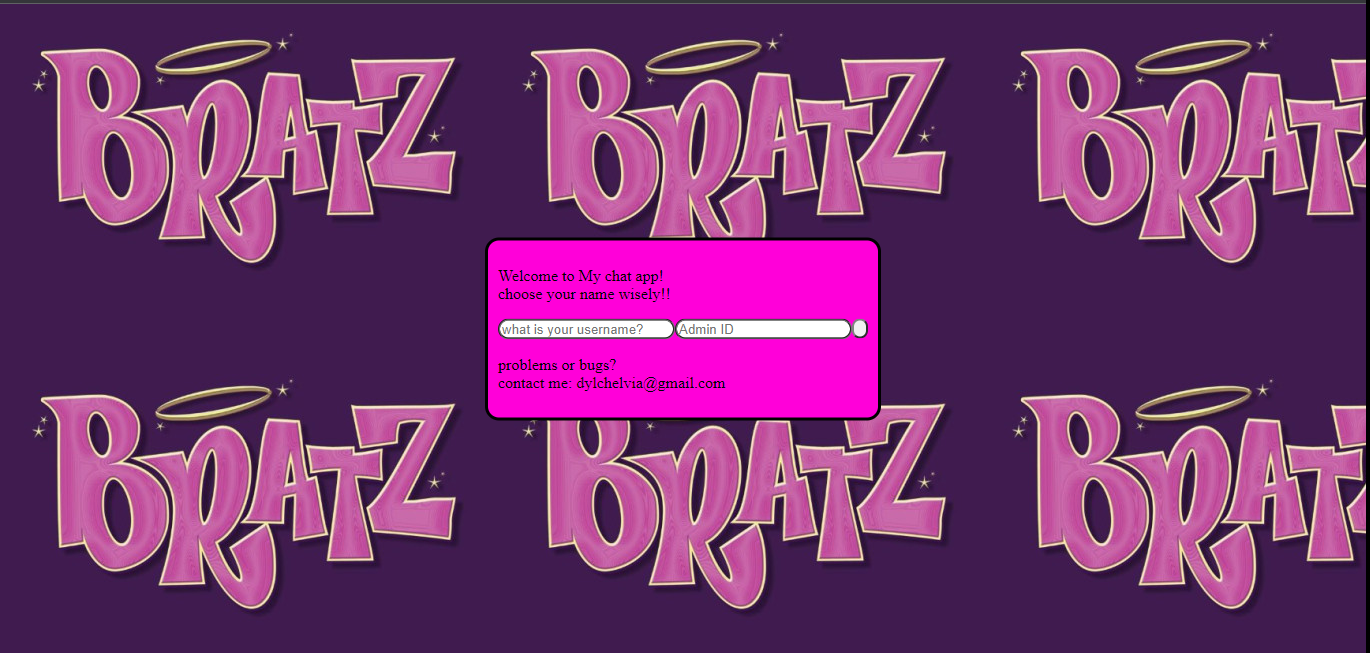 and here is the mainpage of the webapp
Building a nodejs local server
The idea is to build a local nodejs server to host the chat app and store every incoming message in mongodb
Introduction to nodejs
Node.js is an open source server environment. Node.js is free. Node. js runs on various platforms (Windows, Linux, Unix, Mac OS X, etc.) Node.js uses JavaScript on the server.
Introduction to mongodb
MongoDB is a non-relational document database that provides support for JSON-like storage. The MongoDB database has a flexible data model that enables you to store unstructured data, and it provides full indexing support, and replication with rich and intuitive APIs.
Introduction to mongoose
Mongoose is an Object Data Modeling (ODM) library for MongoDB and Node. js. It manages relationships between data, provides schema validation, and is used to translate between objects in code and the representation of those objects in MongoDB.
Explaining of the code
If a message comes in this will check if its a ping(a call out for all online users), a pong( the answer to a pong with the name of the person in it)
try {
    msgObj = JSON.parse(message.toString());

    // t is JSON so handle it how u want
    // if message has Pin of Pong in it send it to the PingPongHandler
    if (Object.keys(msgObj)[0] == "ping") {
      sendPong("codettes2022", "Dylan's Server", "cb_12345678");
    };
    if (Object.keys(msgObj)[0] == "pong") {
      handlePong(msgObj.pong);
    }; // pong value is an object!!
The for loop checks if there is a : is the message that will help is separate the name of the user and the message from each other
 for (var i = 0; i < lengt; i++) {
      if (incomming[i] == ":") {
        var com = i;
        var place_name = i - 5;
        var place_inmes = i + 2;
        var login = false;
        console.log(i);
      }
    }
The substr function removes a little peace out of a large string this helps us get only the username in the variable name and only the message in the variable name
var name = incomming.substr(0,place_name);
var inmessage = incomming.substr(place_inmes,lengt);
If the message is a welcome message it will be stored under a login key and send to be saved in a collection for login messages
if (inmessage == incomming) {
        var myobj = {  login: inmessage, time: Date() };
        var collection = "login";
    }
If the message is not a welcome message the username, message and the time it was send will be stored under there separate keys and send to be saved in a collection for user messages
else{
  varmyobj= { name:name, message:inmessage, time:Date()};
  varcollection="messages";
    }
This hosts the chatapp so when someone goes to the link this will serve up the html page and everything it needs
constpublicDirectoryPath=path.join(__dirname,'data')
app.use('/',express.static(publicDirectoryPath))
The final moment
Did i or did i not waste my time?
That is the golden question.
anddd the answer is…………………………….
YESSS it does
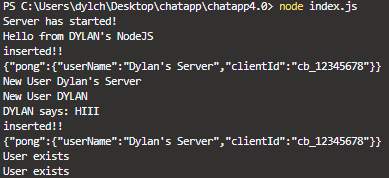
Here the chatapp is hosted on the nodejs server
Here the nodejs server is saving the messages in mongoDB
Here the login message can be seen saved in mongoDB
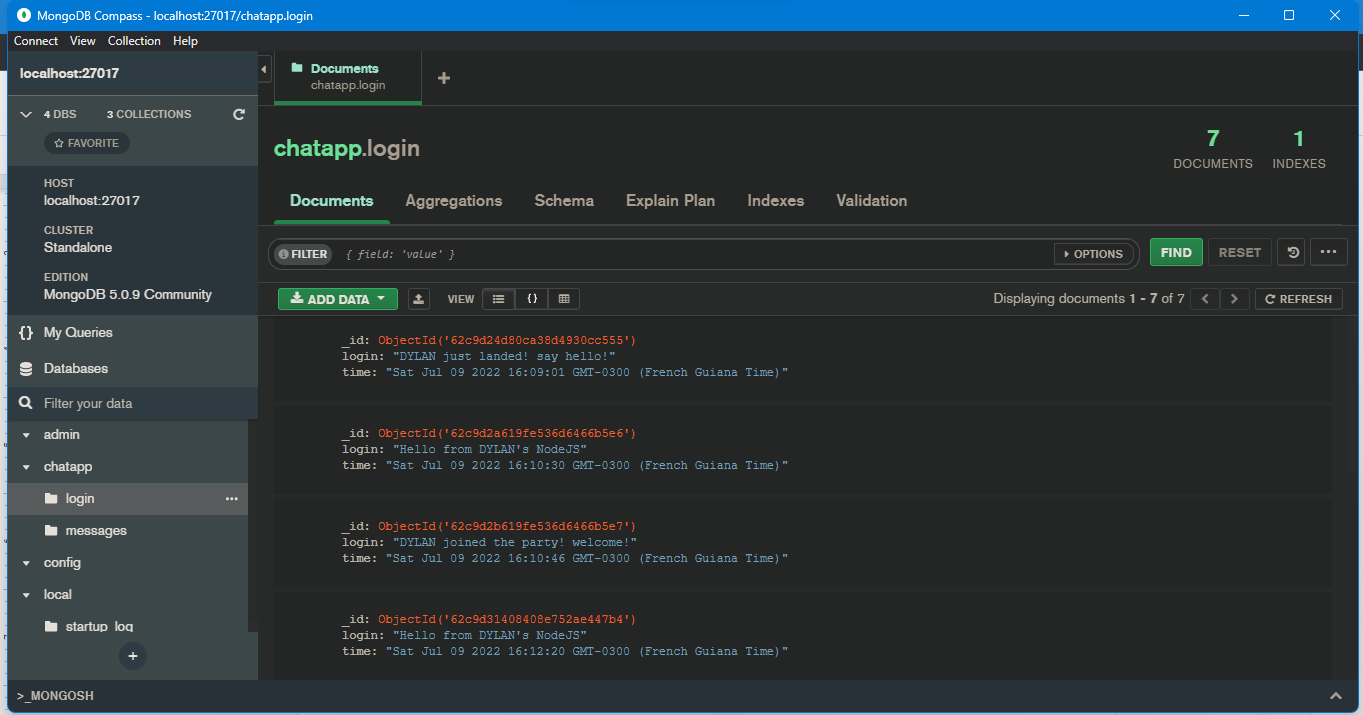
Here the user messages can be seen saved in mongoDB
code and referencis
the link to the site and to the code
Build UI mockups for your FInal Project and HTML Layout
This was my first sketch of the Visionary glove it showed the build lay-up of one of the gloves
Explain the HackOmation quadrant in relation to your final project
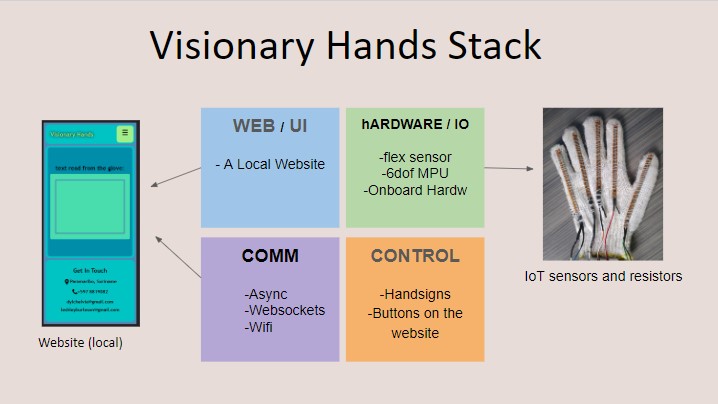
so for the communication stack it begins with the glove that creates a websocket connection and the web app connecets to that websockets connection.
the web app waits for a message from the glove and when 1 is sent the webapp displayed the letter or word
Create data-bound widgets to display sensor data
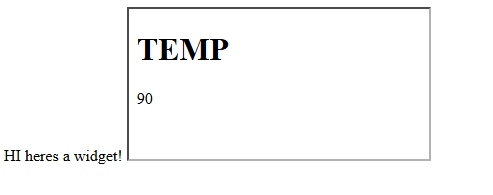
here i created a simple data-widget with a nodejs server back end
3D printing
Introduction to 3D printing
3D printing, also known as additive manufacturing, is a method of creating a three dimensional object layer-by-layer using a computer created design. 3D printing is an additive process whereby layers of material are built up to create a 3D part.
Introduction to 3d printing filaments
The most used filaments are PLA and ABS
PLA and ABS are both thermoplastics. PLA is stronger and stiffer than ABS, but poor heat-resistance properties means PLA is mostly a hobbyist material. ABS is weaker and less rigid, but also tougher and lighter, making it a better plastic for prototyping applications.
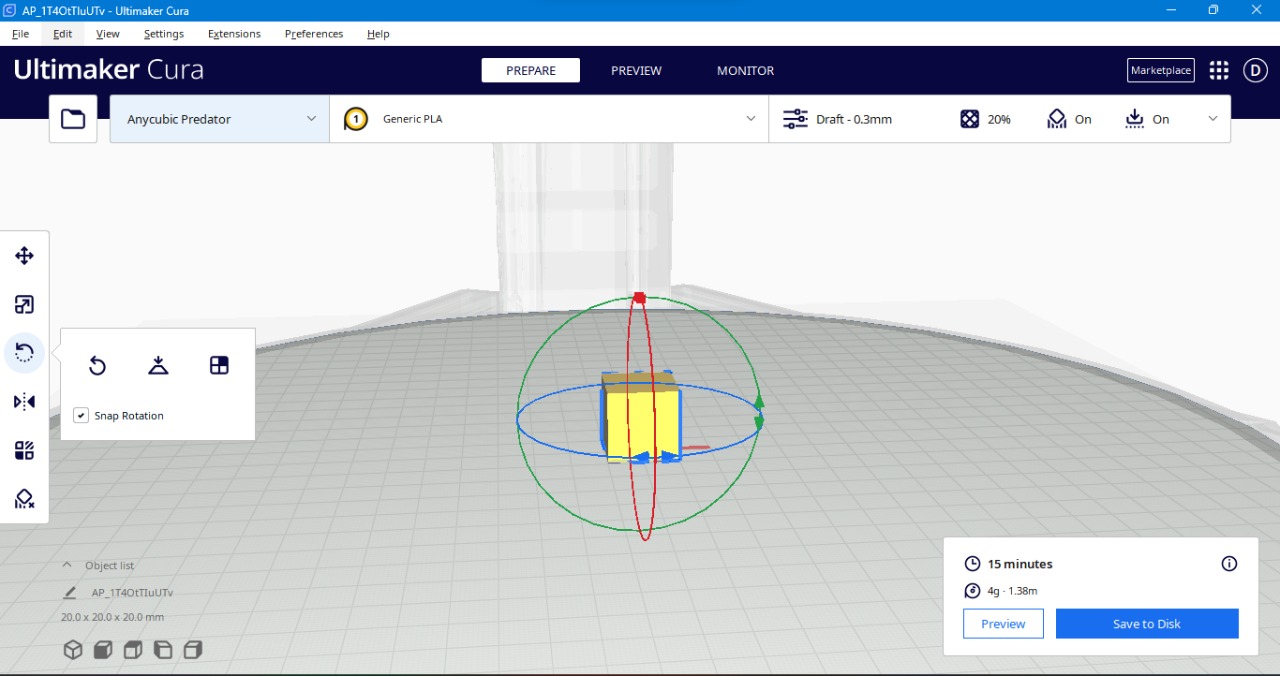
Installing cura and setting up the printer
I opened the setup wizard and followed the steps

After all that i opened the app and setup the printer
First i went to settings and pressed add printer
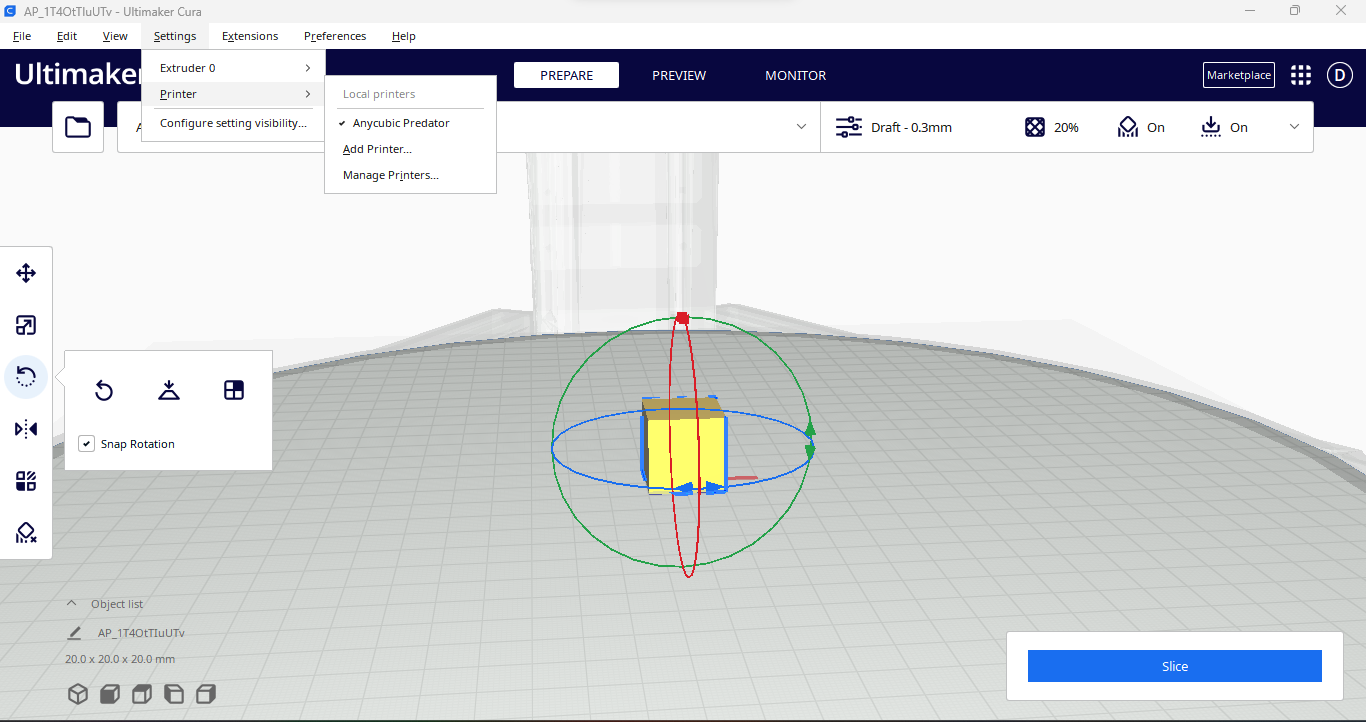
And then i searched for the anycubic predator because we are using that

Setting up the cura parameters
Most of the time you can pick one of these profiles
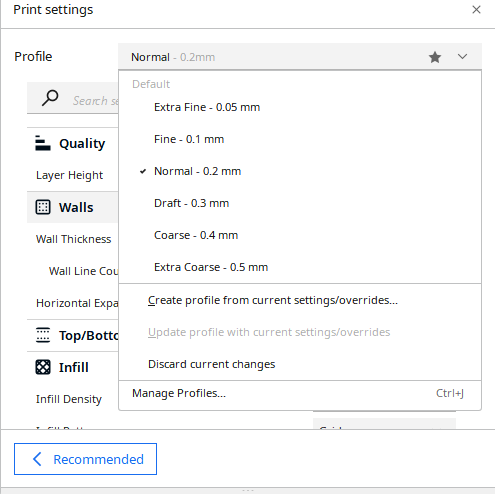
but because we are using pla we have to change some settings like
Support: the support has to be everywhere

Build plate: the build plate has to be on brim

Material: the printing temp has to be on 190C and the build plate temp has to be on 60C

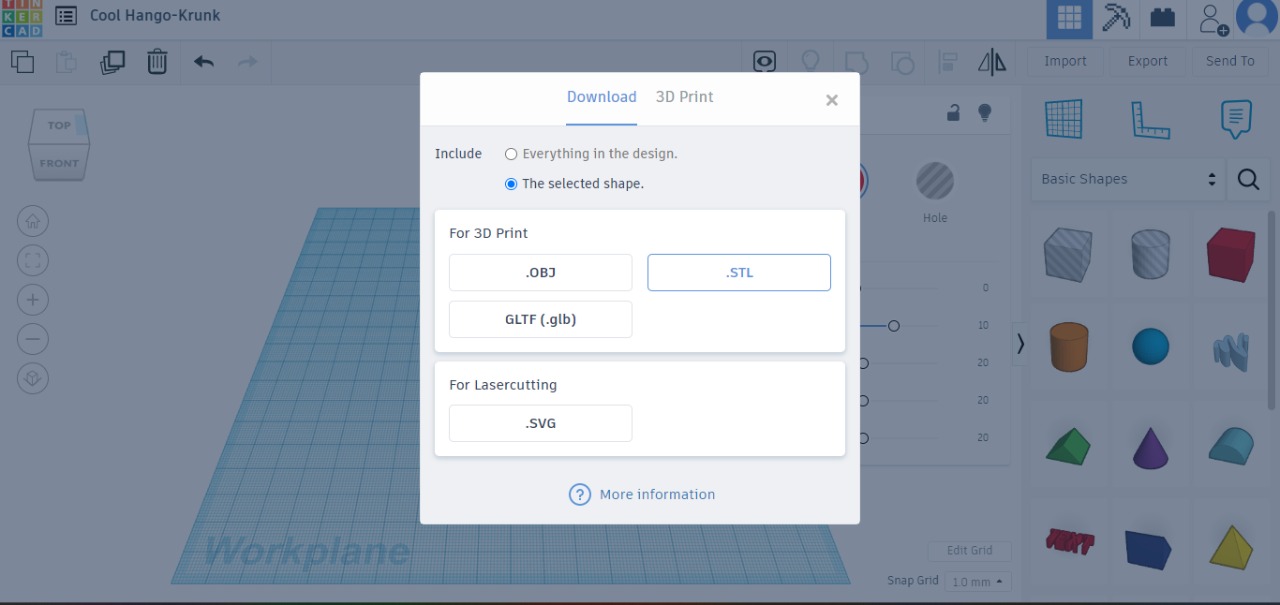
Creating a 3D model for printing with tinkercad
First i open tinkercad and just dragged a random object
And then i exported it as an stl file to use later in cura

Making the Gcode
In cura i opened the stl file that i made in tinkercad

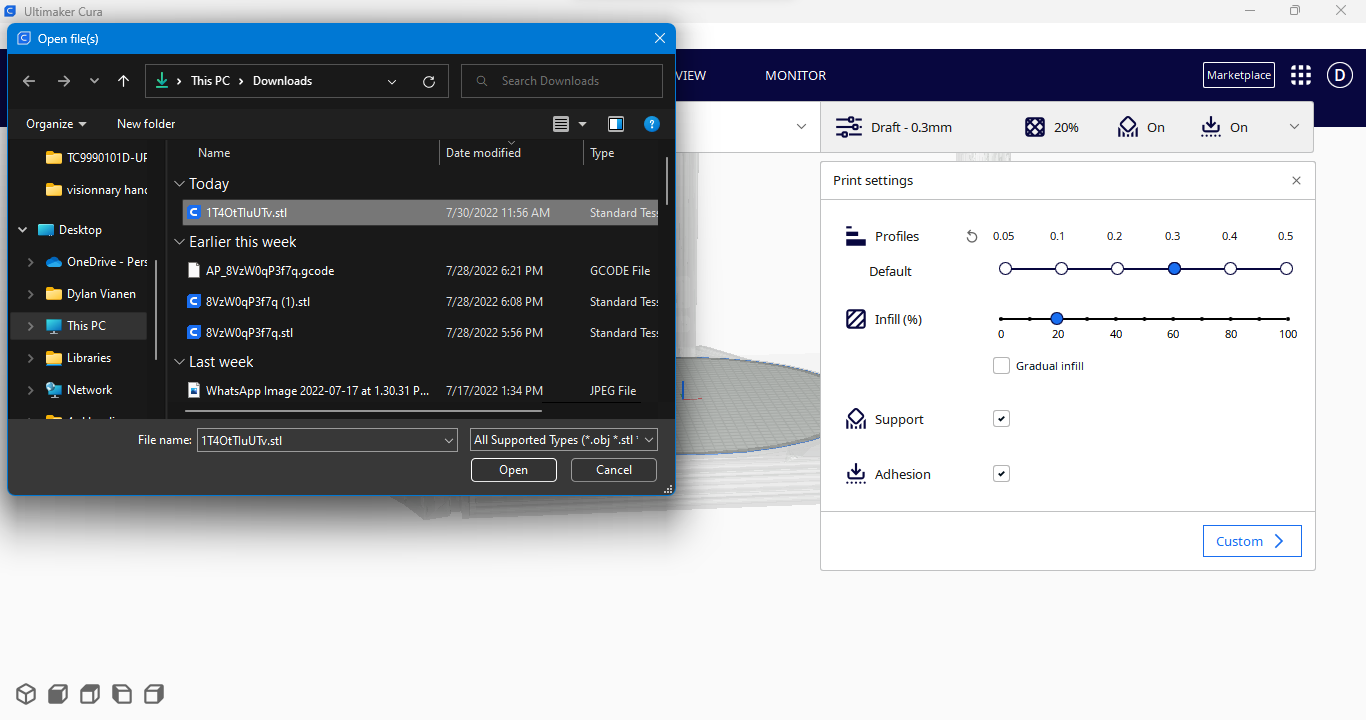
And then i sliced it and saved it as a Gcode
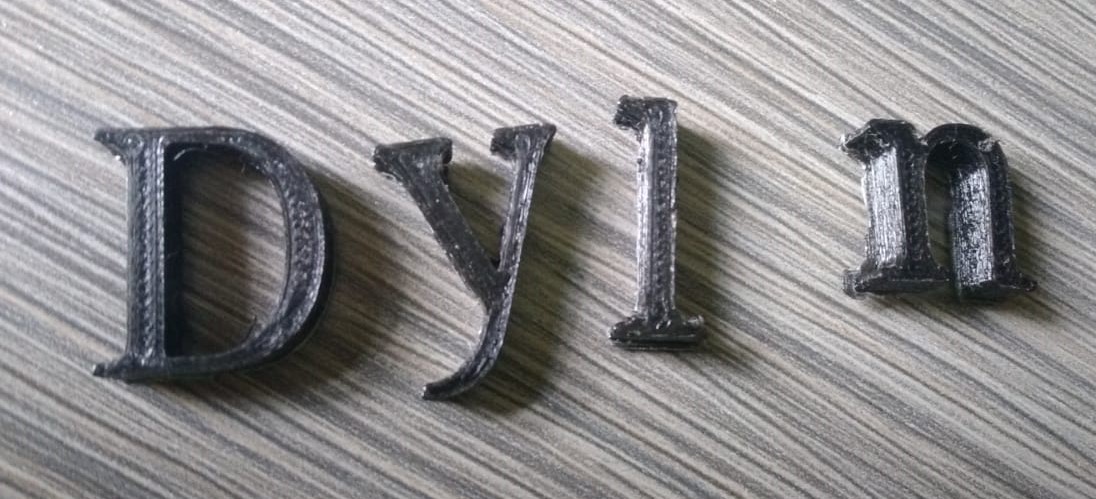
printing something
i choose to print my name. after i made a 3d shape of my name in thinkercad i open cura and set the above specified perams i saved it as Gcode and put it on a SD card and put the SD card in the 3d machine. in the mchin interface i searched for my Gcode and loaded it. after checking if every params where good i pressed start and waited for th print to finnish, waiting a few minutes to check that the fillament does not jam or not stick to the bottom plate.
after it was finnished this is what i got (i lost the A lol)
Working with freecad
introduction to freecad
FreeCAD is an open-source parametric 3D modeler made primarily to design real-life objects of any size . Parametric modeling allows you to easily modify your design by going back into your model history and changing its parameters.
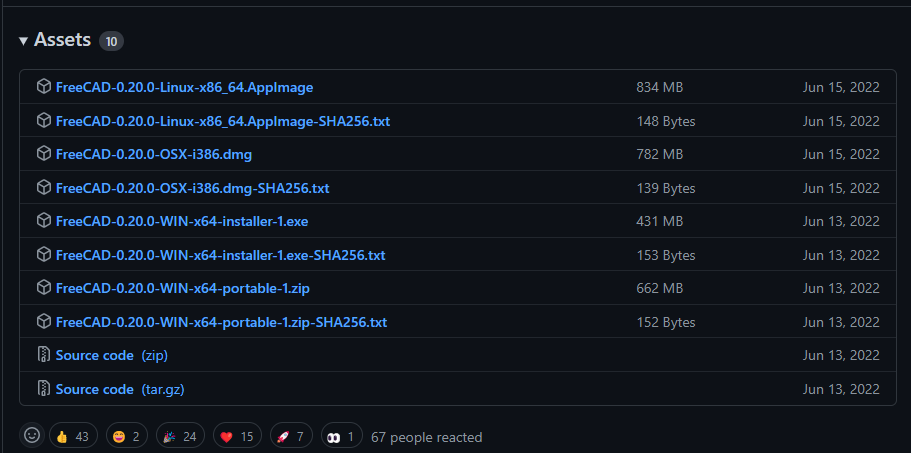
Installing freecad
I went to this site and scrolled down till i saw this And then i pressed on the 2.0 windows 64 bit version and waited for the download to finish
After it was done i open the installer and went through the steps

Making a basic 3d shape
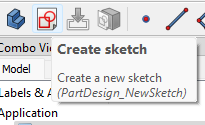
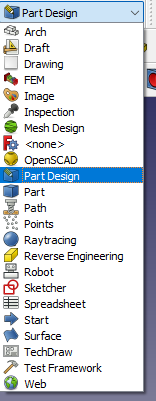
After it was done installing i opened freecad and made a new file, after that i pressed on the section toggle and pressed on part design

After that i made a new sketch
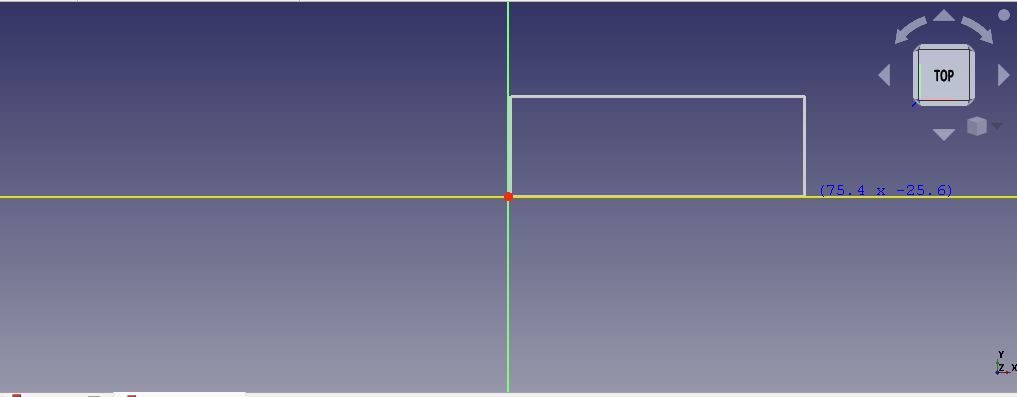
Where i choose the xy_plane

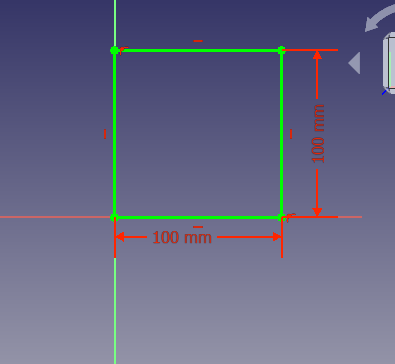
And here i made a basic block

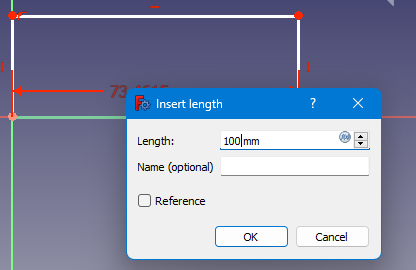
Then i choose constrain for horizontal and vertical

And i set them both to 100mm
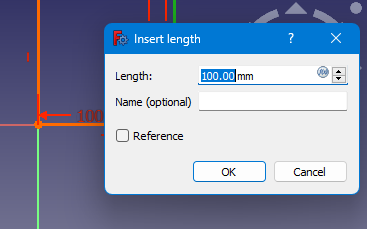
And then you get this basic square

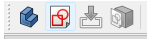
When you have a square you press on Pad(that will make it a 3d schape)
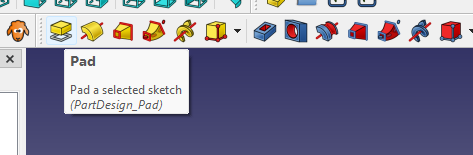
And i set the dimension to 10mm

And when you do that you get this 3d shape

Making a pocket in the basic 3d shape
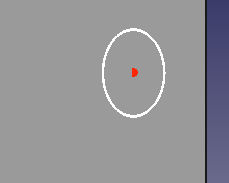
I made a new schape in the XY_Plain

And pressed on create circle

And added s circle on the 3d shape
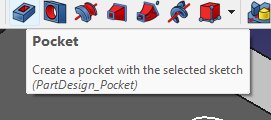
After that i pressed on pocket
And checked symmetric to plane or reversed
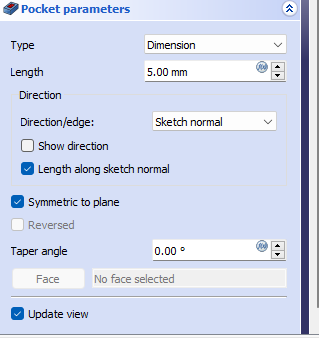
And the you schoul have a hole!!

2d and 3d designing
Making a basic 3d shape
After it was done installing i opened freecad and made a new file, after that i pressed on the section toggle and pressed on part design
After that i made a new sketch

Where i choose the xy_plane

And here i made a basic block


Then i choose constrain for horizontal and vertical

And i set them both to 100mm


And then you get this basic square
When you have a square you press on Pad(that will make it a 3d schape)

And i set the dimension to 10mm

And when you do that you get this 3d shape

Making a pocket in the basic 3d shape
I made a new schape in the XY_Plain
And pressed on create circle
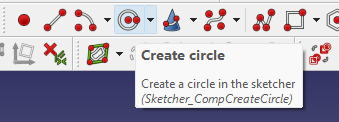
And added s circle on the 3d shape

After that i pressed on pocket

And checked symmetric to plane or reversed

And the you schoul have a pocket!!
CNC
introduction to CNC
Computer numerical control (CNC) is a method for automating control of machine tools through the use of software embedded in a microcomputer attached to the tool . It is commonly used in manufacturing for machining metal and plastic parts.
making the Gcode of the freecadshape
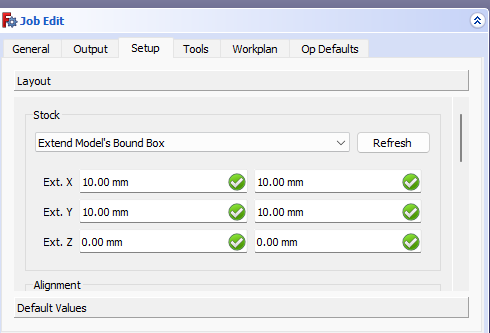
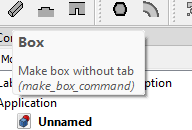
First we create a job

And select the body

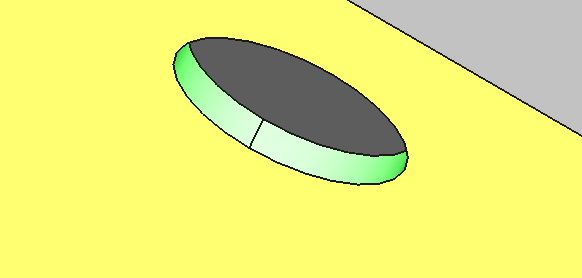
Then we make the outer box a bit bigger then the shape we already have
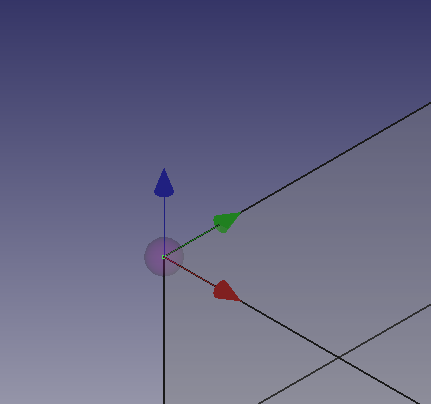
Then we scroll to the top point of the shape a press it

Then we set the origin to the top of the shape
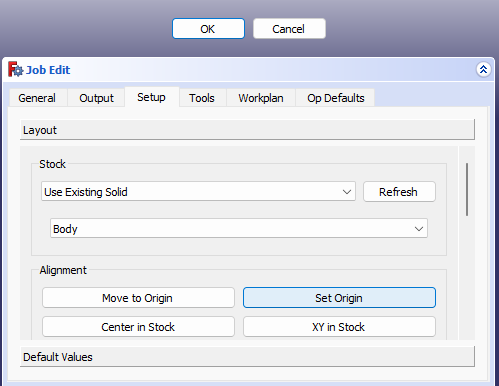
And then it will look like this
Then we set the output up by selecting the processor(uccnc)
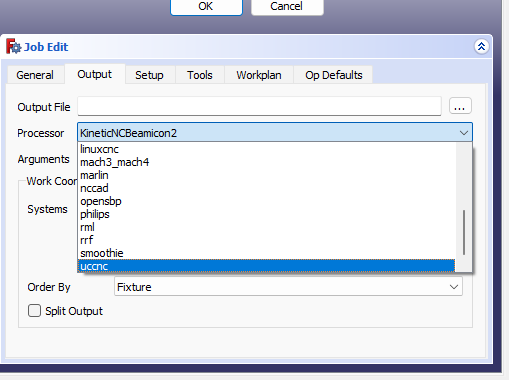
And writing the output file

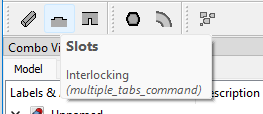
After that we go to the ToolBit dock
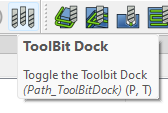
And press on the 3 toolbits
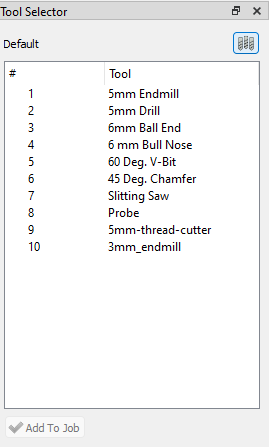
And then of create tool because we are using a another bit
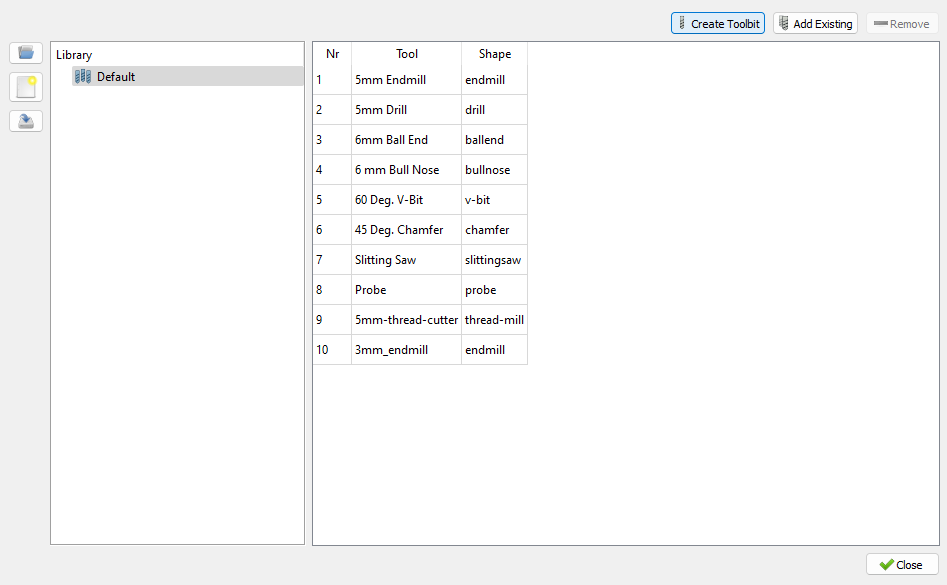
Then we choose the endmill toolschape
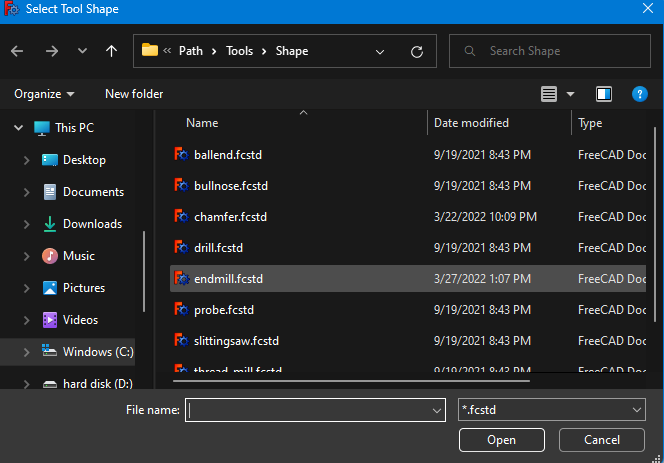
And give it a name

Then we have to change these stuff as you see here

Then you add it to our job and dubble press it
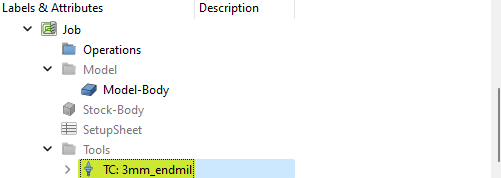
And change the feed and spindle of the ToolBit

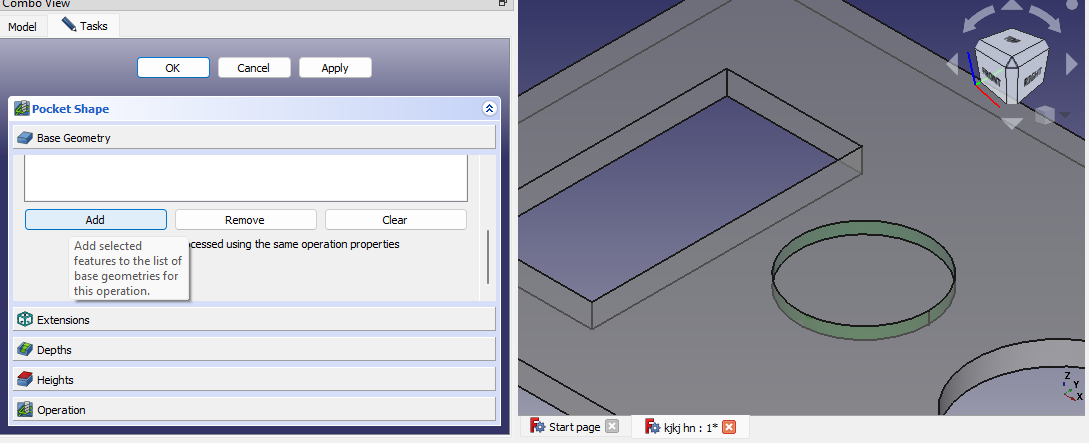
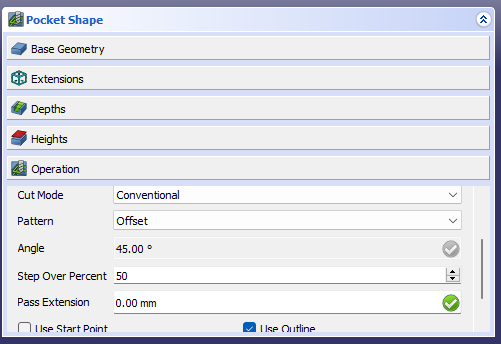
After that we press pocket schape

And choose the outline of the pocket shape and add it to the base geometry
And then we change the start depth, final depth and the step down(half of the ToolBit)
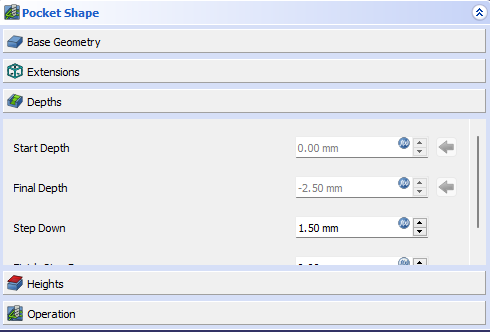
The cut mode should be conventiu=onal and the pattern should be offset
And Then we press on profile
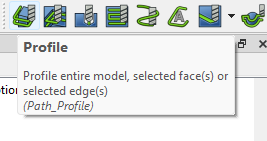
And then we select both hole shapes
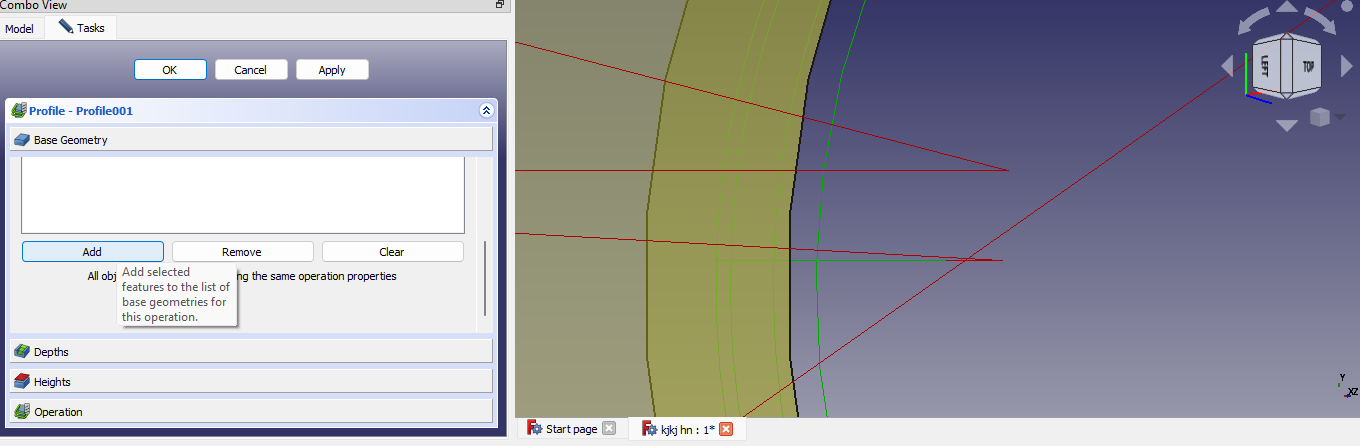
And make then inside cut
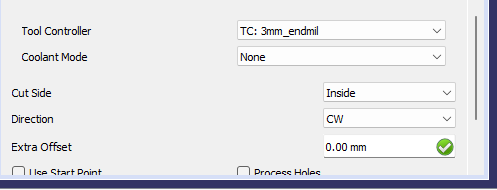
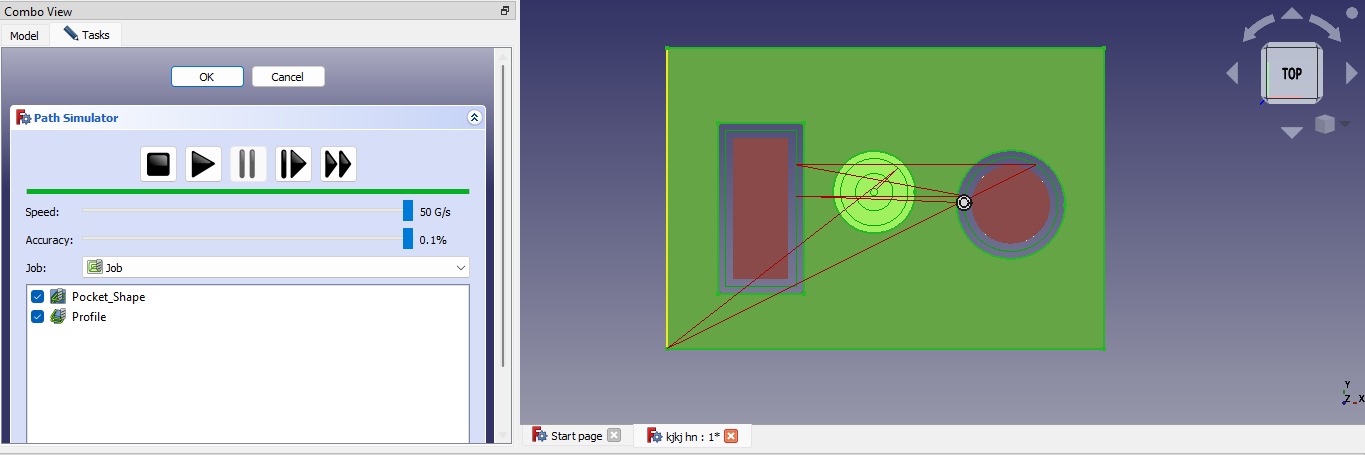
And then we simulate everything

And it should look like this

cutting out the cnc Gcode
for ym final project i cnced a hand that a drawed in (a drawing app) and followed the same steps above to make the Gcode. after that i loaded the cnc software called stepcraft after i loaded the gcode and set the xyz origen and started the gcode. it ran without problems!
(i could not get any photos because the stepcraft didnt work on my device BUTT i maneged to get 1 photo)
here is the finall look at the Hand!

Lasering
Introduction to lasering
The use of a laser beam to cut, divide, or dissolve a substance, or to treat an anatomic structure.
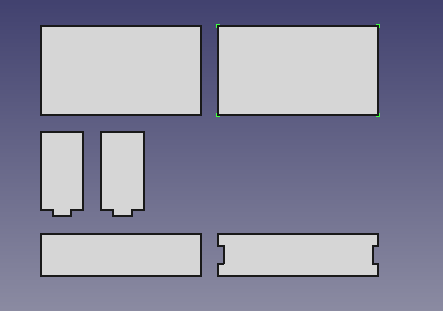
making a laser sketch
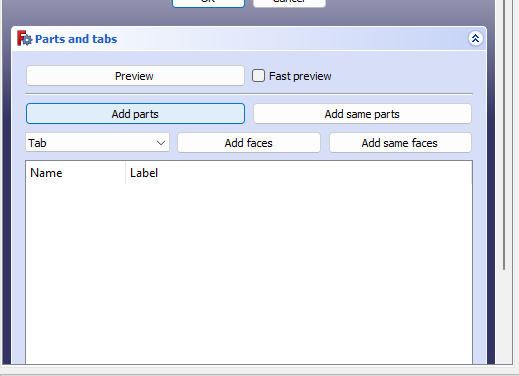
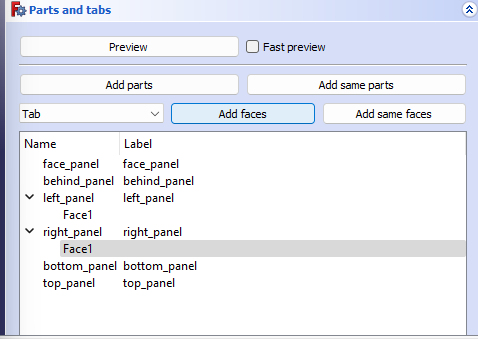
To make the laser sketch I used freecad.
First i installed the laser addon for freecad
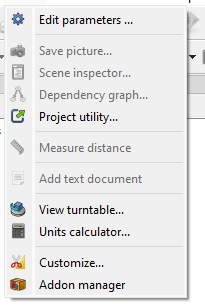


Busines model canvas
introduction to Business Model Canvas
The Business Model Canvas is a strategic management template used for developing new business models and documenting existing ones. It offers a visual chart with elements describing a firm’s or product’s value propositio, infrastructure, customers, and finances, assisting businesses to align their activities by illustrating potential trade-offs.
A business model canvas is basicely a business plan(Plan for successful operation of a business or startup that identifies Sources of Revenue and Target Customer Base combined with details of Financing) oversite in one page.
a business model canvas is good for pitching, its Customer Focused, Easy for Presenting and many more
Canvas were initially proposed in 2005 by Alexander Osterwalder
The parts of a business model canvas
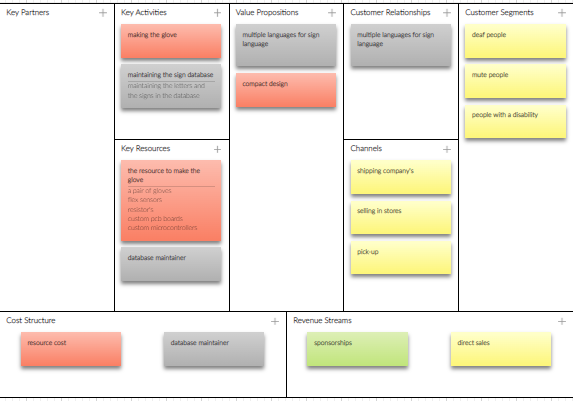
a business model canvas can be split in 9 different parts
and these are
. Key partners
here you specify who you need as a partner to run you business. The less partners you have the better because then you have less people to pay
. Key Activities
here you specify what processes or tasks need to be done to keep your business running
. Key Resources
here you specify what resources you need for your key activities
. Cost structure
here you specify all your costs to keep your business up and running(opperational expensis)
. Value proppositions
here you specify what kind of services or problem solvers your business has to ofer to the customer
. Costomer relationships
here you specify what you have to over that can keep your costomers hooked to your business(what sets you out from the others)
. Channels
here you specify how your business is going to bring there product or service to the costomers
. Customer Segments
here you specify your target audionce(the people who are mostly going to buy your product or service)
. Revenue Streams
here you specify all your income streams(all the ways that your business earns monney)
here is my business canvas
Pitch deck/Poster
the pitch deck is used for presenting or giving people a quice look into what your trying to do or doing
your pitch deck can have anything you want on it but it usualy has everything abput your project or business and it should attract people to your booth
here is my pitch deck
pitching
when your pitching your business you have to have a impact story about the pain your trying to solve at the beginning becuase that will draw the peoples attention and make them remember you business longer. use a lot of visualisations in your powerpoint
there is my powerpoint
Lasering
Introduction to lasering
The use of a laser beam to cut, divide, or dissolve a substance, or to treat an anatomic structure.
making a laser sketch
To make the laser sketch I used freecad.
First i installed the laser addon for freecad